How Poor Drafting Increases Manufacturing Cost (And How to Fix It) 

In the manufacturing industry, material prices, availability of the machine, or even labor rates are commonly cited as causing cost overruns. Nonetheless, poor drafting is one of the least taken into consideration factors that have led to increased manufacturing costs. Decisions in the engineering drawings might be adding hours of machining time, more inspective effort, and expensive rework even before a piece reaches the shop floor. 

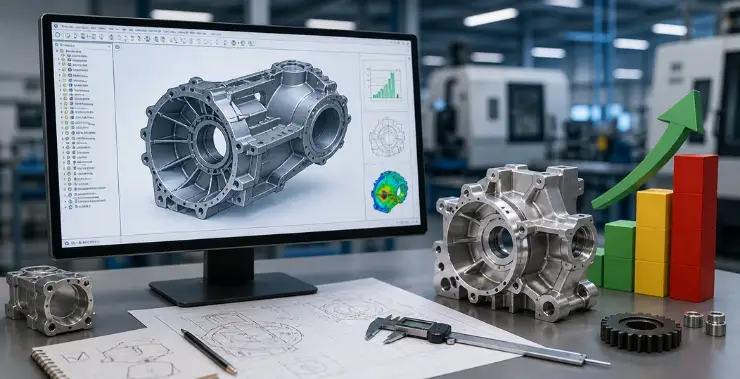
Even the most developed CAD models produced in SolidWorks, Inventor, or such programs are not able to cover the unclear, incomplete, or poorly designed engineering drawings. The failure of drafting to effectively convey design intent makes manufacturers go through the process of guessing; and it is quite costly. 

This blog describes why the cost of manufacturing is raised when a design is poorly created, the number of mistakes that designers usually make, and what are the pragmatic options to correct such problems. 


Why Drafting Has a Direct Impact on Manufacturing Cost 

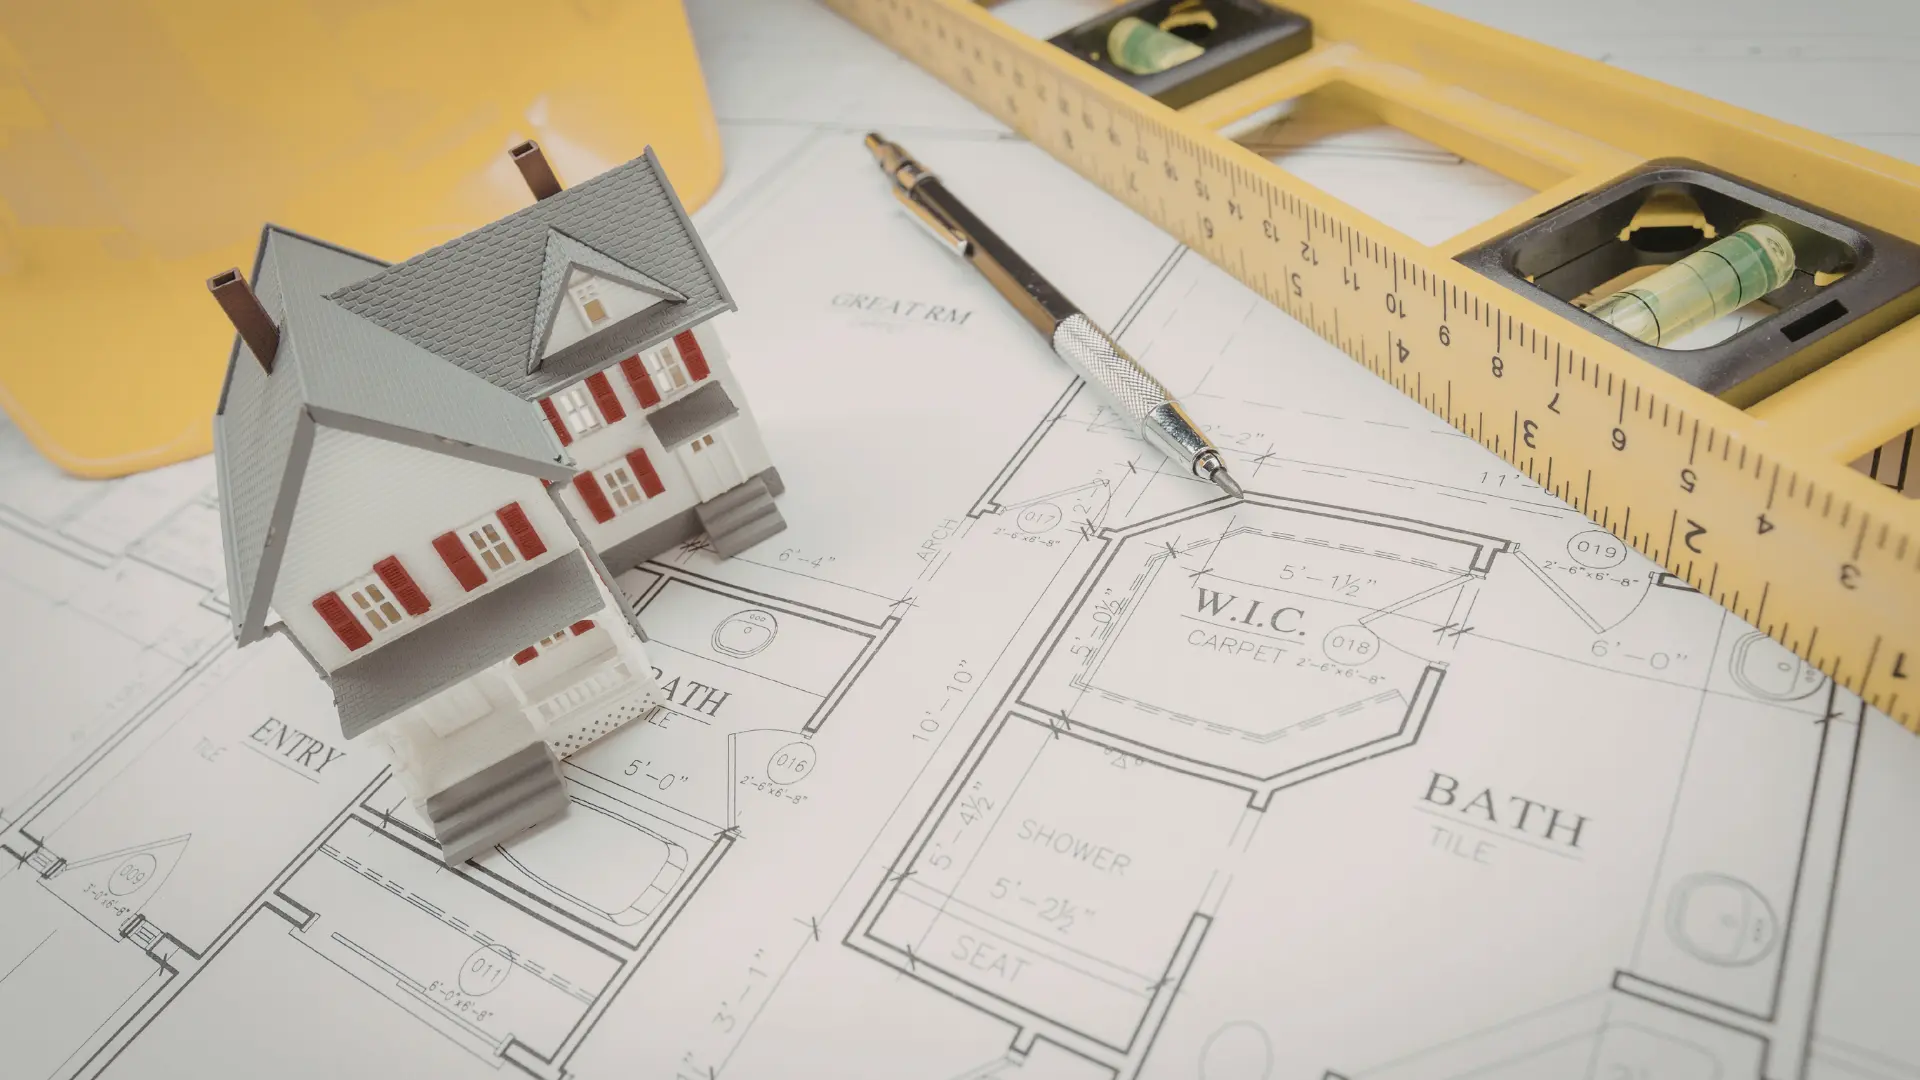
Engineering drawings are not just a documentation, they are a guideline to manufacturing. Each dimension, each tolerance, each note, each symbol has a direct impact on the production of a part, its inspection and assembly, and therefore clarity and precision is a necessity in order to perform it correctly on the shop floor. 

Loss of clarity in drawings makes manufacturers waste more time in deriving the vague dimensions, seeking clarifications, changing machining plans and redoing mis-produced parts. These inefficiencies translate into higher manufacturing costs, resource wastage and long lead times in manufacturing. 


Poor Drafting Issue #1: Missing or Ambiguous Dimensions 

Missing or vague dimensions are one of the most widespread drafting issues. The most common assumptions made by designers include providing the manufacturer the chance to guess it out based on the 3D model but assumptions are very dangerous in the production setting. 

Dimensions that are ambiguous compel machinists to: 

  • Make their own interpretation. 
  • Stop production in order to ask questions. 
  • Include additional set-up and verification procedures. 

Any interruption costs time and time is money. Full dimensioning puts an end to uncertainty and ensures the flow of production. 


Poor Drafting Issue #2: Over-Dimensioning and Conflicting Information 

Although missing dimensions are troublesome, over-functioning can also be destructive. When the same feature is dimensioned many times or the dimensions do not agree, the manufacturers are left in a dilemma as to which dimensions to believe. 

The dimensions that are conflicting tend to cause: 

  • There will be production delays as clarifications are sought. 
  • Wrong machining on the basis of the wrong reference. 
  • More inspection effort. 

Well-written drafting can give only the required dimensions, which are clear and not redundant. 


Poor Drafting Issue #3: Unrealistic or Excessive Tolerances 

One of the largest cost drivers in the manufacturing process is tolerances but they are poorly understood and misapplied. Designers often impose very tight tolerances in a complete drawing without considering whether those limits are actually necessary or not, and it is rarely thought through how this complexity will be added to the manufacturing process. 


Manufacturing wise, unnecessary tight tolerances result in slower machine speeds, extra finishing, and extra inspections all of which add more time and expense to the production process. They also increase the possibility of rejection and rework of part. The use of realistic, functional based tolerances assists in sustaining performance and at the same time, manufacturing costs are lowered and the overall efficiency is enhanced significantly. 


Poor Drafting Issue #4: Ignoring Tolerance Stack-Up 

Tolerance stack-up is a phenomenon whereby a series of individual tolerances is added together resulting in either assembly or functional issues. Weaknesses in drafting practice usually do not address the issue of how part-level tolerances combine at assembly level to create designs that are hard to make assembly. 


Parts might not fit properly during assembly when tolerance stack-up is not considered, leading to either manual correction in assembly or rework becoming inevitable. In such cases, manufacturers have to reimburse the design aspects and this means that it takes more labor time, scrap rate and the total cost of production. 


Poor Drafting Issue #5: Misuse or Overuse of GD&T 

Geometric Dimensioning and Tolerance (GD&T) is an effective tool, errors in its application may disorient manufacturers instead of benefiting them. 

Common GD&T mistakes include: 

  • Incorrect datum selection 
  • Delivering GD&T in cases where simple dimensions are applicable. 
  • Unnecessarily over-constraining features. 

The bad usage of GD&T makes the inspection more complicated and tend to be misinterpreted. Good GD&T must not make design intent difficult but rather make it clear. 


Poor Drafting Issue #6: Vague Material and Finish Specifications 

The specifications of material and surface finish have a direct influence on tooling, machining plan, and cost. Callouts like steele or smooth finish are too vague and can be understood in too many ways. 

The specification of material not being clear may result in: 

  • Wrong material selection 
  • Stalling as suppliers ask questions. 
  • Sudden performance problems. 

The accurate material grades and finish specifications enable manufacturers to plan and quote in a realistic way. 


Poor Drafting Issue #7: Drawings That Are Hard to Read 

An untidy and badly arranged drawing is a drag to all the processes of production. Superimposition of the dimensions, varying text sizes, and crowded views would tend to complicate the learning of machinists and inspectors to extract data in a short period. 

Poor readability leads to: 

  • Greater interpretation time. 
  • Increased probability of errors. 
  • Lower productivity at the work station. 

Neat drawing with large spacing enhances understanding and minimizes errors. 


How to Fix Poor Drafting and Reduce Manufacturing Cost 


  1. Write the Process with Manufacturing in Mind. 

Always think of the way in which the part is going to be produced. The datum dimensions used in machining and reference features of a functional nature as opposed to cosmetic features. 


  1. Strategic use of Tolerances. 

Tight tolerances should be used only when necessary by the functionality. General tolerances should be defined in the title block and critical features should be reserved specific tolerances. 


  1. Use GD&T Purposefully 

Use GD&T when it is clarifying. Make sure datum structures are realistic manufacturing and inspection arrangements. 


  1. Streamline and Elaborate Drawings. 

Filter out junk, make sure to eliminate unnecessary dimensions and set views in order. An easy-to-read sketch will save time in all the production stages. 


  1. Bureaucratize Drafting. 

Apply the same templates, title blocks and notes on all drawings. Standardization enhances communication and minimizes error. 


Long-Term Benefits of Good Drafting 

Qualified drafting is worth the time it takes: 

  • Reduced costs of manufacturing and inspection. 
  • Faster production cycles 
  • Fewer design revisions 
  • Better supplier relationship. 

Good drafting is not an overhead- it is a cost saving measure 


Conclusion: Drafting Decisions Have Financial Consequences 

Ineffective writing quiets down the cost of manufacturing at each production phase. Unclear dimensions to over-tolerances, minor drafting errors will have an enormous financial effect. 

The manufacturing-oriented drafting best practices will allow the designers to minimize the cost, enhance efficiency, and develop drawings that the manufacturers will trust and respect. 

In manufacturing, transparency is productivity–and productive writing is profitable writing. 

How to Reduce Manufacturing Cost Without Compromising Product Quality? 

In the modern industrial competitive context, manufacturers and product designers have a never-ending struggle, which is how to cut costs of manufacturing, and at the same time retain or better the quality of the products. Reduction of expense without being mindful of it usually results in poor performance, increased failure, and ruined brand image. Conversely, intelligent cost optimization plans have the potential of improving margins, reducing lead times and increasing product reliability simultaneously. 

The trick is to know that reduction in the manufacturing cost is not concerned with the use of cheaper material or the omission of some crucial processes. It concerns design efficiency, streamlining the processes, aligning the supply chain, and minimizing wastes. 

It is an elaborate reference on how to practically and successfully lower the cost of manufacturing without affecting the quality of product; be it in CNC machining, sheet metal fabrication, injection molding, welding or product assembly. 


Understanding What Really Drives Manufacturing Cost 


You need to have the sense of the origin of cost before you can reduce it. Manufacturing cost will usually be affected by: 

  • Material selection 
  • Part geometry complexity 
  • Machining time and cycle time. 
  • Surface finish requirement and tolerances. 
  • Assembly labor 
  • Tooling and setup time 
  • Rework and scrap 
  • Inefficiencies in supply chain. 

Most businesses consider material cost only but in actual sense 70-80 percent of overall product cost is taken into consideration during design. That is, the cost control begins at the design level – not at the shop floor. 


  1. Apply Design for Manufacturing (DFM) Principles Early

Design for manufacturing at concept stage is one of the most efficient approaches to cost reduction in manufacturing. When cost considerations are taken into account at the early stage of designing, engineers can eliminate a lot of frequent problems in production. Poorly designed components may lead to increased machining durations, to special tooling, to hard-to-fixture configurations, and to low non-conformance. Such issues do not only raise the direct manufacturing costs but also cause delays in production and variation of quality. 


Rather, design should be made simple and practical. Elements that can be easily machined, easily attached and given clamps, symmetrical where practicable, and that can be used with standard tooling greatly simplify the production process. It is also important not to use unnecessary tight tolerances. Strict tolerances add needless time, inspection and scrap to the process with no functional value addition. 


To illustrate, the number of excessive tolerances can be reduced significantly, and this can result in both a reduction in machining and inspection costs. Several parts are excessively tolerated without an apparent need. Features which directly affect performance, fit or safety should have tight tolerances only. Precision where it is needed can ensure the quality of the products allowing the manufacturers to save on the production cost. 


  1. Simplify Part Geometry

Multifaceted geometry raises the CNC cycle time and tool wear, program writing, and inspection price. 

To save money, and not quality: 

  • Avoid deep narrow pockets 
  • Minimize thin walls 
  • Get rid of unwarranted undercuts. 
  • Standardize corner radii 
  • Reduce feature count 

A simpler design costs less to machine as well as enhances repeatability and stability of dimension. 

Simplification enhances consistency of quality in most instances, as they have fewer chances of variation of dimensions. 


  1. OptimizeMaterial Selection Strategically 

The cost of material is a substantial component of the total cost of a product and smarter material choice is even more important. Designers should not blindly select high-grade alloys but need to consider whether these specifications are really needed. Such questions as the real need of extreme strength of application, whether or not aluminium can be substituted with steel, whether mild steel could be used instead of stainless steel in corrosion free conditions or whether the need to choose some standard stock sizes can reduce the amount of waste can result in significant savings without performance impact. 


By selecting material that is easy to machine, readily obtainable in the market, has standard thicknesses or diameters and is somewhat compatible with tools already available in the market it is possible to save a lot of money in manufacturing. These options assist in reducing machining time, material waste and lessening the procurement procedures with the structural integrity that is required. 


Nevertheless, downgrading in material has to be done with care. Proper mechanical, thermal and environmental analysis should support any change. Safety, durability as well as long term performance must not be compromised on cost reduction strategies. It is not to employ cheaper materials mindlessly but to utilize smarter materials in a responsible manner. 


  1. Reduce Manufacturing Steps

Each new process step will add: 

  • Labor cost 
  • Setup time 
  • Risk of error 
  • Handling damage 
  • Look for ways to: 
  • Combine operations 
  • Eradicate secondary machining. 
  • Combine functionality within one installation. 
  • Reduce part count 

As an example, part consolidation during assemblies can: 

  • Reduce fasteners 
  • Lower inventory cost 
  • Decrease assembly time 
  • Improve reliability 

The smaller the number of components, the smaller the number of failure points – this increases the overall quality of the product. 


  1. Standardize Components and Hardware

The custom fasteners, special bolt sizes, or fittings make procurement more complicated and slow down assembly activities. It may involve carrying the extra stock, multiple suppliers and frequent replacement of the tools on the shop floor. Rather than that, standardizing the sizes of the bolts, employing common types of thread, reducing the number of tools that have to be changed through the assembly process, and using easily sourced off-the-shelf parts can make production much easier. 


The advantages of standardization are that the purchase costs are lower, the time spent in controlling the inventory is less, the assembly is quicker, and long-term maintenance is much easier. With the help of the widely found elements, manufacturers enhance the efficiency and consistency of their operations without affecting the performance or the reliability of products. 


  1. OptimizeTolerances and Surface Finishes 

Excessive tolerance is one of the largest cost drivers that are not well known. 

  • Tighter tolerances require: 
  • Slower machining speeds 
  • More precise tooling 
  • Additional inspection 
  • Higher rejection rates 

On the same note, stating unneeded fine surface finishes raises the cycle time and cost of finishing. 

To optimize: 

  • Use functional tolerance 
  • Apply GD&T strategically 
  • Tolerance to relaxation wherever possible. 

Only where necessary, specify surface finish. 

Note: All surfaces do not have to be machined to a mirror finish. It is only critical mating surfaces that are in need of high precision. 


  1. Improve Production Efficiency and Cycle Time

Cycle time has a direct relationship with the cost of manufacturing. 

Ways to reduce cycle time: 

  • Design for fewer setups 
  • Make sure that the tools are accessible. 
  • discourage interior complicated geometries. 
  • Designs conforming to a normal tooling. 
  • Empower automation where applicable. 

Even a slight change in the cycle time per part would result in the substantial annual savings in medium-volume to high-volume production. 


  1. Focus on Assembly Efficiency

Assembly labor is not considered as expensive. 

To reduce assembly cost: 

  • Design self-aligning parts 
  • Minimize fastener count 
  • Take snap-fit or interlock. 
  • Make sure that there is proper orientation during assembly. 
  • Eliminate manual skill adjustment. 

Efficient assembly minimizes the labor hours and minimizes the possibility of defects in assembly. 

Quality when the assembly is easier for assembly will be better since there will be less variability. 


Common Mistakes to Avoid 

In attempting to lower manufacturing cost, the following errors are to be avoided: 

  • Replacing expensive materials with blindly switching. 
  • Elimination of critical quality inspections. 
  • Excessively tightening tolerances. 
  • Designing without seeking the advice of suppliers. 
  • Disregard of total lifecycle cost. 
  • Value should be added through cost reduction, and not reliability. 


Final Thoughts 

  Persuasion to reduce manufacturing cost is best achieved when it is considered at an initial stage of product development. After the tooling has been completed and it starts production, design alterations are costly and disruptive. With the use of Design for Manufacturing principles, tolerances that are optimized, strategic material selection, simplification of processes, assembly efficiency at the concept stage can help companies reduce the costs of production by a substantial margin and yet, on top of it, the overall quality of the product can be improved, and in most cases, it is even higher. 


The contemporary manufacturing industry has given the smart, collaborative, and endless optimization of systems as the competitive advantage. In the case of long-term profitability, do not forget that the lowest cost product is not the one that is merely cheaper to make and produce, but the one that can give you reliable quality at the lowest overall lifecycle cost. 


DFM Checklist for Mechanical Engineers: A Practical Shop-Floor Guide

Design for Manufacturing (DFM) is not an option anymore in product development in a modern method: it is a competitive edge. When mechanical engineers embrace the DFM principles at an early design stage, they always produce products that are cheaper to manufacture, more economical and dependable in the actual production set up. There are usually delays, cost overruns, a lot of rework, and frustrated suppliers in those who fail to consider DFM.

This is an action-oriented shop-floor manual on DFM checkpoints that can be applied to mechanical engineers working in CNC machining, sheet metal fabricating, welding, assembly, and general manufacture. Rather than being filled with theory, this article gives a simplified, practical checklist one can look at prior to printing any drawing to production. 

When you need to buy fewer materials to manufacture a product, enhance product quality, lead time, and engineering change orders (ECOs), this DFM checklist would assist you in designing smarter. 


What Is Design for Manufacturing (DFM)? 

Design for Manufacturing Designing parts and assemblies in such a way that it is cheap, easy and dependable to manufacture. It is concerned with making geometry as simple as possible, making tolerances as small as possible, choosing the right material, eliminating extraneous complexity, and matching the design to the capabilities of the real shop-floor. 

A substantial portion of the product cost is settled upon in the design phase – long before the production begins. It implies that mechanical engineers are the most influential in terms of profitability and manufacturability. DFM does not aim at reducing quality standards. It is involved in having an efficient performance goal. 


The Core DFM Checklist for Mechanical Engineers 

Instead of dividing DFM into too many categories, we will focus on the most critical areas that directly affect manufacturing cost, quality, and production speed. 

  1. Material Selection: Function Over Assumption 

One of the most important Design for Manufacturing (DFM) decisions is the proper choice of the material because the selection directly determines the cost, performance, and the efficiency of production. 

  • Select materials according to real, rather than habit and over-engineered, functional needs. 
  • Determine whether the material is over specified and whether a more machinable grade is available that can lead to shorter CNC time and lesser tool life. 
  • Make sure that the material is in common stock sizes so that lead time and unnecessary cost are not wastage. 
  • Exotic alloys should not be used where performance can be achieved with standard aluminium, mild steel or common stainless steel. 
  • Think of the effect on fabrication operations, tools, corrosion resistance and the total cost of manufacturing. 
  1. Geometry Simplification and Machining Efficiency 

One of the largest cost drivers in manufacturing is that of complex part geometry. Deep pockets, slim walls, sharp internal corners and redundant undercuts contribute to longer machining times, tool life, and more complex programming. 

Do not just go by bullets, but think practically: Can the part be machined in fewer setups? Are tool access paths clear? Can internal corners be used with conventional end mill radii? Is it symmetry to simplify operations? Is there an ability to combine or even remove several features? 

The simplified geometry can also be used to improve dimensional consistency besides reducing CNC cycle time. In the shop floor, the plain parts can travel quicker, cause less mistakes and they will yield less scrap. Complexity might be appearing impressive in CAD, but it typically adds to the cost of manufacturing. 


  1. Tolerance Optimization and Functional Precision 

Tolerance optimization is an important topic in Design for Manufacturing and over-tolerance is one of the most advanced and costly errors that mechanical engineers commit. 

  • Unnecessary tight tolerances should never be used as they add to machining time, effort during inspection, and risk of rejection. 
  • It is recommended to assign such tight tolerances to critical mating surfaces and other performance-related specifications; tolerance should be reasonable on non-critical dimensions. 
  • It is important to remember that with tighter tolerances, machining speeds are usually slower, and inspection operations are more detailed, which raises the cost of manufacturing. 
  • Design tolerance stack-up at assembly level to avoid cumulative variation issue at the assembly level. 
  • Particularly make sure that parts are not just accurate but also convenient and effective to measure in the shop floor. 
  1.  Surface Finish and Secondary Operations 

Surface finish is a type of cost that is usually disguised in the production. Giving very fine finishes on the surfaces of complete parts, those parts which may only need it, adds a lot of time to machining. 

Prior to deciding on the values of surface finish, inquire whether a standard machine finish was adequate. Is it really necessary to polish, grind, coat or plate? Is it possible to divide cosmetic requirements and functional surfaces? 

All other finishing operations result in labor, risk and lead time. DFM also asks engineers to only specify things that will enhance performance or durability and not the superfluous perfection. 

  1.  Design for Fabrication and Welding 

The fabrication intensive industries experience distortion, alignment issues and overworking of welding due to poor DFM practices. The sizes of the welds are over specified resulting in more heat input and part distortion. 

Good DFM must be able to take into consideration welding access, distortion control and necessity of the structure. Is it possible to lower weld length without loss of strength? Is it possible to design parts which are self-locating or self-jigging? Do the weld symbols have a clear definition and are practical? 

Over welding is not stronger, and results in more distortion and increased cost. Smart designs also minimize the rework and enhance structural integrity. 

  1.  Assembly Efficiency and Part Count Reduction 

One of the main ideas of Design for Manufacturing (DFM) is the part reduction which allows to increase the efficiency of the assembly process and decrease the cost of production. 

  • Profitability of assembly is not taken seriously during the design of the product. 
  • By minimizing the number of components in a design, it makes the total assembly process easier. 
  • Designers are supposed to consider whether several parts can be brought together as one piece. 
  • The use of standard fasteners removes the complexity required in inventory and simplifies assembly. 
  • Components must have intuitive and foolproof orientation so as not to install them wrongly. 
  • The necessary parts ought to be accessible to reduce time and effort during the assembly. 
  • The less the parts, the fewer assembly errors and production downtimes. 


  1. Process Selection and Production Volume Alignment 

Making the wrong decision on the manufacturing process will kill the profitability. CNC machining would be ideal where the production volume is low, but at greater volumes, injection molding, casting, or stamping can be more cost effective. 

Production volume and lifecycle expectations should be considered before completing your design. Is it worth investing in tooling? Does additive manufacturing serve the right purpose or does it substitute more effective conventional methods? 

Aligning the design with the right production process is cost-effective on a large scale. DFM is long-term thinking – not prototype success. 


Inspection, Quality, and Cost Awareness 

A design has to be simple to conduct production on – but it has to be simple to check. Obvious data models, quantifiable sizes and realistic areas of tolerance enhance quality control efficiency. 

Mechanical engineers ought to think business wise as well. What is the figure of the cycle time? How many setups are required? Are there secondary processes which are hidden? What is the scrap risk? 

Having knowledge of shop-floor cost drivers enables the engineer to design profitably, as opposed to technically.


Common DFM Mistakes to Avoid 

Even the most accomplished engineers make one of those traps that could be avoided: 

  • Over-engineering components 
  • Ignoring supplier feedback 
  • Setting tight tolerances which are not necessary. 
  • Delaying the manufacturing consultation. 

DFM is most effective when the team of designers and the team of producers work together at an early stage and regularly. 

The Actual Worth of a Real DFM Checklist. 

When a structured Design for Manufacturing checklist is applied the following improvements can be measured: 

  • Lower manufacturing cost 
  • Reduced scrap and rework 
  • Faster production cycles 
  • Improved product quality 
  • Minimized change orders in the engineering department. 
  • Better supplier relations. 

Above all, DFM develops the correspondence between the engineering intent and the execution at the shop-floor. 


Final Thoughts: Design for the Real World 

The perfect mechanical engineers do not work in isolation. They reason as machinists, welders, fabricators and assembly operators. Questions to ask before publication of a drawing: Can this part be economically, repetitively and profitably produced? 

A realistic DFM checklist will convert product design into an imaginary process to a practical production solution. In the competitive manufacturing industries, those firms that focus on engineering accuracy and manufacturing intelligence always perform better than others. 

By simply using the principles of DFM, you will not only decrease the cost of manufacturing – you will enhance the quality of your product, decrease the lead time and develop more resilient production systems. 

Design for Manufacturing (DFM) vs Design for Assembly (DFA): What Designers Often Get Wrong

In product design and engineering, it is one half to design a part that would be good in CAD. It is only after the design leaves the screen that the real challenge starts when it becomes a shop floor challenge. Here is where Design for Manufacturing (DFM) and Design for Assembly (DFA) are involved. 

In as much as these two concepts are used interchangeably, they are not synonymous and mixing these two concepts may result in increased costs of manufacturing, delay in production and assembly problems. Most designers unwittingly optimize one and totally ignore the other; to produce designs that are simple to create and hard to put together, or simple to put together and very costly to create. 

In this blog, the differences between DFM and DFA are broken down, the pitfalls designers usually fall into, and both methods are demonstrated to achieve efficient design that is production worthy. 


Understanding Design for Manufacturing (DFM) 

Design for Manufacturing (DFM) is the design of parts so that they can be easily and cheaply and dependably manufactured with the available processes, typically CNC machining, laser cutting, sheet metal fabrication, injection molding, or 3D printing. 

The fundamental objective that DFM tries to achieve is to minimize manufacturing complexity without losing functions. When properly implemented, a DFM strategy will make sure that the manufacture of parts can be handled in an efficient and stable way with limited levels of waste, reworking, and trouble with tools. 

CAD wise, be it SolidWorks, Inventor or any other parametric modelling package, DFM affects such decisions as geometry simplicity, feature choice, material choice, tolerances, and surface finishes. 

Key Principles of DFM 

  • Reduce complicated geometries which demand special tooling. 
  • Use conventional material profiles and thicknesses. 
  • Unnecessary tight tolerances should be avoided. 
  • Design characteristics that are congruent with production. 

DFM worksheet, when designers neglect to observe DFM, manufacturers are required to make alterations to the design – a cost, time and risk addition to the project. 


Understanding Design for Assembly (DFA) 

Design for Assembly (DFA) emphasizes on the ease and efficiency with which the assembly of a product can be done, instead. It also goes beyond the individual components and takes into account the way that the components come together to produce a finished product. 

DFA aims to: 

  • Reduce the number of parts 
  • Streamline assembly line procedures. 
  • Limit the work of handling, rotating and fastening. 
  • Enhance completeness and reproducibility of assembly. 


Good DFA design will allow a design to save on labor costs and assembly time significantly, particularly during high-volume production. 


DFM vs DFA: The Key Difference Designers Miss 

The greatest error that designers commit is to believe that DFM automatically refers to DFA- or vice versa. As a matter of fact, one design may be good in one aspect and bad in the other. 

For example: 

  • One component could be very simple to machine and have five fasteners and difficult to align in the process of an assembly. 
  • Another component may assemble perfectly but it may need costly tooling or complicated machining operations. 

DFM is concerned with efficient production of parts. DFA concerns assembling parts in an effective manner. The two are both indispensable and should not be made to look optional. 

Common Mistakes Designers Make with DFM and DFA 

  1. Designing Only for CAD, Not for Manufacturing

Among the most typical ones is the design with visual symmetry or CAD convenience in mind. Such items as unnecessary fillets, decorative cut-outs or fancy contours might appear impressive in SolidWorks or Inventor, but will just add time and cost in machining. 

Aesthetic attributes not considerably functional to the manufacturer do not earn the manufacturer any pay. Each additional toolpath, setup or operation adds cost. 


  1. Overusing Tight Tolerances

Among cost drivers in manufacturing, tight tolerances take up the greatest share. Tight tolerances have been used by designers as a safety measure, when they are not even aware of the actual effect they can have. 

From a DFM standpoint: 

  • Narrow tolerances are slow to machine. 
  • They make inspection time more. 
  • They might necessitate special machinery. 

This is actually damaging to assembly in a DFA perspective because too many tolerances may be detrimental, particularly when tolerance stack-up is ignored. 

Good design implies to make tight tolerances where they are necessary. 


  1. Ignoring Assembly Sequence During Design

Most designers design parts without even considering how they would be assembling.  

This leads to issues like: 

  • Components that require bending or coercion. 
  • Hardly reachable fasteners. 
  • Assemblies possessing several reorientations. 

The design could go through all the checks of DFM, and fail in actual assembly. DFA has the designers walk through the assembly step-by-step mentally (or digitally). 


  1. Excessive Part Count

The spinning part count is a traditional DFA failure. Designers tend to divide parts in a number of sections to make them easier to model or produce without factoring in the assembly effect. 

Each additional part: 

  • Adds handling time 
  • Enhances the possibility of errors in assembling. 
  • Increases complexity of inventory and logistics. 

The combination of parts or designing of multi-functional parts is better to enhance the efficiency of assembly as well as improve the long-term reliability whenever possible. 


  1. Poor Fastener Strategy

The fasteners are sometimes perceived as a second thought. The Designers combine various forms of screws, lengths, and tools-increasing the time and errors made in assembly. 

Good practice in DFA promotes: 

  • Standardizing types of fasteners. 
  • Reducing fastener count 
  • Applying self-locating or snap-fit where necessary. 

It does not only enhance the process of assembly, but also minimizes procurement and maintenance. 


How DFM and DFA Work Together in Practice 

The most successful products would strike a balance between DFM and DFA in parallel, and not as two different stages. 

For example: 

  • The machined part (DFM) may be simplified in order to be self-locating during assembly (DFA). 
  • DFM may be avoided by reducing the number of parts (DFA). 

With the help of the modern CAD, such as SolidWorks and Inventor, it is becoming less difficult to consider the two aspects during the early design stage using the parametric modelling, assembly simulation, and interference checks. 

Early design in CAD influences the manufacturing cost and assembly efficiency in a gigantic way in the future. 


Role of CAD Tools in DFM and DFA 

CAD software plays a critical role in supporting both DFM and DFA when used correctly. 

SolidWorks & Inventor Best Practices 

  • Use parametric design to adapt designs quickly to manufacturing feedback 
  • Create manufacturing-ready drawings with clear tolerances and notes 
  • Validate assembly sequences using digital mockups 
  • Avoid unnecessary features that don’t add functional value 

However, software alone cannot fix poor design thinking. DFM and DFA are mind-sets, not just checklists. 


Why Designers Often Learn DFM and DFA Too Late 

A lot of designers undergo much training in the CAD modelling tools but they have limited exposure to the actual manufacturing environment. Consequently, the concepts such as Design for Manufacturing (DFM) and Design for Assembly (DFA) are usually acquired when the issues with the product are detected in the course of production. This lack of harmony between design and manufacturing is often seen to result in re-work and re-design of the design, and miscommunication with the suppliers and extra cost and time to produce. The only way to fill this gap is to work closely with manufacturers, machinists, assembly teams in the initial design stages and ensure that design choices are made based on some practical manufacturing and assembly limitations early in the design process. 


Practical Tips to Improve DFM and DFA in Your Designs 

The following are some of the practical things that the designers can put into place at any given time: 

  • Consult manufacturers regarding the review design. 
  • Challenge all the features: Does it provide functional value? 
  • Assemble at an early stage in the design process. 
  • Minimise the number of parts used where feasible. 
  • Intent in manufacturing and assembly of documents in drawings. 

Even minor design enhancements can produce a huge saving in the cost in the future. 


Conclusion: Designing Beyond the Screen 

Design for Manufacturing and Design for Assembly are not pathos–they are core to good engineering design. When designers solely embark on CAD beauties or performance in theory only, they tend to produce prototypes that do not succeed in the real production process. 

Knowing the distinction between DFM vs DFA and considering both at the initial design phase, engineers will have an opportunity to design products, which are not only functional, appealing, but efficient, economical and scalable. 

Ultimately, the most desirable designs are not the most elaborate ones, but those that can be made with little difficulty, assembled with little difficulty and work found to be reliable. 

How Structural Detailing Service Prevents Design and Execution Errors?

In the construction and engineering industry, precision is everything. A single defect in the design or an error during the execution can cause costly delays, risk to safety, and compromise structural integrity. This is where Structural Detailing Service plays a very crucial role. They serve as a bridge between design ideas and on-site construction, ensuring that every component of a structure is clearly defined, accurate, and buildable.


It can be residential, commercial, or industrial construction, and it helps in the elimination of ambiguity and in reducing the number of mistakes made at each level of construction. Let’s explore how it prevents design and execution errors and why it is essential for successful project delivery.  


What Are Structural Detailing Services?

Structural detailing involves the process of preparing detailed works, plans, and documents of all the structural elements (beams, columns, slabs, and connections). The fabricators, engineers, and construction teams use these drawings to understand how each component is to be produced and assembled. 


This process includes:


  • Reinforcement detailing (rebar drawings)
  • Steel detailing (fabrication drawings)
  • Connection detailing
  • Shop drawings and erection drawings


These deliverables ensure that the design purpose is properly transferred into real-life construction. 

1. Eliminates Design Ambiguities


Mistakes during construction are due to unclear or incomplete design documents. The architects and structural engineers often provide conceptual or general drawings, but they do not have the idea of the fine details required for execution.


They bridge this gap by:


  • Giving the right dimensions and specifications.
  • Explaining the complicated design aspects.
  • Specifying material needs and location.


By removing ambiguity, detailing ensures that all stakeholders, from engineers to contractors, are on the same page, reducing the risk of misinterpretation.

2. Improves Coordination Between Teams


Construction projects require the involvement of multiple teams, such as architects, structural engineers, MEP engineers, fabricators, and contractors. Poor coordination among these teams can lead to clashes and costly rework. 


These services improve coordination by:


  • Combining multi-disciplinary design data.
  • Detecting conflicts in advance of construction.
  • Assuring structural and non-structural compatibility.


For example, a collision between a beam and an HVAC duct can be detected during detailing rather than during construction, saving time and money.

3. Enables Early Error Detection


It is essential to identify mistakes at the early stages of the project life to reduce costs and schedule. Designs are analysed with advanced tools and software to identify possible problems before construction.


Key benefits include:


  • Identification of design inconsistencies.
  • Determination of missing or incorrect elements.
  • Checking load paths and structure.


Detailing prevents costly changes and project delays by identifying mistakes at an earlier stage before they can get to the construction area.

4. Enhances Accuracy in Fabrication


Inaccurate fabrication is a significant cause of construction mistakes, particularly on steel and precast buildings. In-shop detailed drawings direct manufacturers on how to produce components of the same specifications, ensuring better accuracy and fit during construction.


This results in:


  • Precise cutting, bending, and assembly of materials.
  • Reduced material wastage.
  • Improved quality control.


Accurate fabrication ensures that the components are perfect in terms of size, reducing the need for making adjustments on the site. 

5. Reduces Rework and Project Delays


One of the most costly and time-consuming construction issues is rework. It is usually caused by design failures, misunderstanding, or incorrect execution.


Structural detailing minimizes rework by:


  • Providing clear and precise instructions.
  • Ensuring all elements are pre-verified.
  • Minimising speculation in the building.


With proper drawings and guidelines, workers can perform their tasks right the first time and complete their projects at a faster rate.


6. Ensures Compliance with Standards and Codes


Construction projects must comply with local building standards, safety regulations, and industry standards. Violation may lead to legal penalties, fines, and unstable constructions. A Design for Manufacturing strategy also helps in ensuring a design is practical, efficient, and oriented towards reality in the construction processes.


They ensure compliance by:


  • Adhering to the codes and standards.
  • Addressing safety requirements in designs.
  • Providing documentation for approvals and inspections.


This not only enhances safety but also ensures smooth project approvals and inspections.

7. Supports Efficient Project Planning


A precise description also helps in enhanced planning and resource management in a project. Highly detailed drawings and specifications make planned materials, labor, and schedules more effective for the project managers. 


Benefits include:


  • Accurate quantity take-offs.
  • Better cost estimation.
  • Improved scheduling and workflow.


This level of planning reduces uncertainties and helps keep the project on track.

8. Facilitates Better Communication On-Site


Effective communication is another crucial aspect in construction. Failure to understand teams can cause errors, delays, and safety hazards.


Structural detailing improves communication by:


  • Presenting easy-to-understand illustrations.
  • Standardized symbols and notations.
  • Providing clear installation instructions. 


This ensures that everyone on-site, including supervisors and workers, understands what to do and how to do it right.

9. Leverages Advanced Technology


Contemporary solutions consist of high-technology tools like CAD (Computer-Aided Design) and BIM (Building Information Modeling) that are used to generate accurate and well-coordinated models.


These technologies offer:


  • 3D Structural visualization.
  • Team-to-team collaboration in real time.
  • Clash analysis and automatic error detection.


Structural detailing improves accuracy and minimizes mistakes by using these tools.

10. Improves Overall Construction Quality


Ultimately, structural detailing aims at high-quality construction. Detailing helps in a more reliable, safer, and stronger structure, as all problems are solved before they arise.


High-quality detailing leads to:


  • Improved structural performance
  • Increased life span of structures.
  • Enhanced comfort for the occupants.

Conclusion


Proper implementation in construction commences with proper and detailed plans. These services ensure that all the aspects of a design are clearly represented, helping the team to avoid confusion, minimize errors, and remain consistent through the project life cycle.


At Keyways, we support smooth construction procedures through reliable and accurate structural detailing services. Join us on LinkedIn and discover how we help engineering and construction teams to deliver projects within the project management life cycle in an error-free manner.

How Structural Detailing Services Turn Engineering Designs into Reality?

In modern construction and infrastructure development, engineering designs are only the starting point. These designs need extremely detailed documentation and specific technical instructions to turn them into real structures. This is where structural detailing becomes essential. It serves as the bridge between the engineering concepts and the actual construction process, ensuring that each component is built accurately. A professional Structural Detailing Service transforms engineering drawings into documents that contractors and manufacturers can easily follow and fabricate.   

These services help prevent costly errors, improve efficiency, and ensure structural integrity. In addition, modern detailing practices increasingly integrate Design for Manufacturing principles to make structural components easier and more cost-effective to produce. Below, we explore how structural detailing services transform engineering plans into real, functional structures. 


Understanding Structural Detailing

Structural detailing is the process of creating precise drawings and technical documentation that can be used to fabricate and install structural components. Engineers develop the initial structural designs and then transformed into precise and build-ready drawings by detailers, which can be used during the building process by the manufacturer and construction teams.   


Bridging the Gap Between Design and Construction

Engineering drawings focus on the structural computations and design concepts. However, these drawings may not provide the level of detail required for fabrication and construction. Structural detailing fills this gap by converting design information to specifications that are easily understood and followed by the builders.

A reliable Structural Detailing Service plays a vital role in ensuring that engineering ideas are successfully implemented during construction.


Important ways structural detailing bridges this gap include:

  • Turning engineering ideas into clear drawings for fabrication.
  • Providing accurate sizes and specifications of structural parts.
  • Training contractors in the housing and installation of components.
  • Ensuring that all structural elements fit well in construction. 
  • Reducing confusion between engineers, fabricators, and site teams.


The Role of Technology in Structural Detailing

Technology has improved the structural detailing a lot more accurately and efficiently. Modern detailing tools enable specialists to produce highly accurate digital models and detect problems before fabrication.

Today’s detailing processes tend to integrate the use of advanced software and digital collaboration tools. The technologies also promote the Design for Manufacturing concept, which entails designing easier-to-fabricate designs.  

Technology supports structural detailing through:

  • Using 3D modeling software, such as BIM and structural detailing software.
  • Early identification of conflicts between diverse building systems.
  • Allowing teams to communicate the updates promptly on digital platforms.
  • Assistance in visualizing the structure, then start fabrication.
  • Applying Design for Manufacturing methods to make production easier.


Improving Accuracy and Reducing Errors

Construction errors may cause significant delays, higher costs, and insecurity. Structural detailing reduces the risks by offering precise documentation for fabrication and installation.

A Structural Detailing Service, through accurate drawings and models, manages to ensure that all structural elements are produced and assembled properly.

Structural detailing helps reduce errors by:

  • Providing precise measurements of beams, columns, and other structural components.
  • Providing a clear definition of welding, bolting, and connection requirements.
  • Elimination of guesswork in the fabrication and installation.
  • Early detection of possible design conflicts prior to building.
  • Ensuring all structural parts fit together accurately on site.


Enhancing Collaboration Across Project Teams

Construction projects have a variety of professionals, such as architects, engineers, contractors, and fabricators. Effective communication between these teams is critical to ensure smooth project execution. 

Structural detailers help in enhancing cooperation by converting technical designs into concise and comprehensible drawings. A professional Structural Detailing Service acts as a communication between the design team and the construction professionals.  

Structural detailing enhances collaboration by:

  • Providing standardized drawings that all teams can interpret.
  • Allowing the engineers and contractors to review detailed structural models.
  • Early detection of problems by project stakeholders.
  • Enhancing the supply chain between the fabrication shops and the construction sites.
  • Supporting efficient workflows aligned with Design for Manufacturing.


Supporting Fabrication and Manufacturing

Fabrication facilities depend on precise structural plans to manufacture the parts of a building. Structural detailing provides the specifications that are required to manufacture structural elements efficiently.

A Structural Detailing Service provides manufacturers that can produce structural components with minimal errors by preparing accurate fabrication documents.  

Structural detailing supports fabrication through:

  • Creating shop drawings that guide cutting, drilling, and welding operations.
  • Raising the fabrication planning material lists.
  • Enhancing the efficiency of manufacturing through standardized designs.
  • Less material waste in the production process.
  • Applying Design for Manufacturing techniques to simplify fabrication processes.


Ensuring Compliance and Structural Safety

Construction projects focus on safety. Structural detailing assists in mandating that all the structural components are installed as per the engineering requirements and industry standards.

A well-executed Structural Detailing Service carefully examines the design data and prepares documentation that enhances safe and compliant construction.

Structural detailing contributes to safety by:

  • Ensuring structural components meet engineering specifications.
  • Following industry standards and building codes.
  • Documenting proper installation methods for structural connections.
  • Supporting load-bearing and stability requirements.
  • Reducing the likelihood of structural failures.


Improving Project Efficiency and Cost Control

Construction projects must operate within rigid schedules and budgets. This can be achieved through structural detailing by providing clear documentation before fabrication and installation.

Contractors can work more efficiently and eliminate unnecessary delays when structural components are detailed properly.

Structural detailing improves efficiency and cost management by:

  • Eliminating fabrication errors and rework.
  • Reducing project delays due to poor drawings.
  • Maximize the use of the materials in production.
  • Facilitate faster on-site installation.
  • Incorporating the design of Manufacturing processes to simplify manufacturing.

Conclusion

Turning engineering concepts into real structures requires clear and precise documentation. Structural Detailing Service helps in the transformation of engineering designs into precise drawings that can be readily utilized by fabricators and building teams.

At Keyways, we help businesses streamline projects with reliable structural detailing solutions. Connect with us on LinkedIn to see how we support engineering teams with efficient detailing services.