Product selling today depends on the visualization of products. Bad renders will reduce the quality design into cheapness, drive away buyers, and sales. In the absence of a professional product rendering service, manufacturers and designers are guilty of making simple errors that cost them thousands in lost opportunities. The blog discusses the 5 most expensive mistakes and the ways to fix them with the help of expert rendering services as quickly as possible.
1. Low-Quality Or Blurry Images
Bad quality photos or simple screenshots of CAD software do not impress. Customers get to magnify online and view pixels or jagged edges, and believe that the product is of low quality.
This murder conversions – research results indicate high-res images increase sales by 30 percent. In the absence of proper lighting or textures, your renders are two-dimensional and unattractive.
Product rendering services use ray-tracing tech for photorealistic images at 8K resolution. They incorporate real-life materials such as metal shine or cloth creasing, and make components pop on websites and catalogues.
2. Incorrect Lighting And Shadows
Products are unnatural because of harsh overhead lights or the absence of shadows. Shadows bring a layer of three dimension, and DIY renders usually lack them, and the objects end up drifting like cartoons.
Customers become suspicious – no one wishes to have a machine component that looks like a toy. Poor lighting conceals the form of details such as curves or engravings, which have to be guessed.
The rendering professionals reproduce natural-like lighting: diffused studio lights, strong spotlights, or sunlight. Dynamic shadows demonstrate the interaction of products and environments so that customers can get an idea of how products can be implemented in practice.
3. Irregular Scales And Proportions
The renders in which components appear excessively large, small, or distorted confuse the audience. A gearbox can be minute compared to a bolt without the right angles of the camera.
This leads to wrong expectations and returns. Customers place orders based on visuals, after which they complain of the fit or size of the product.
The exact scaling of CAD files is used by the services with reference objects, such as hands or tools, to guide them. They provide several perspectives, like close-ups, explosions, and complete assemblies, which are always taken with correct proportions.
4. Lack of Context Or Lifestyle Scenes
Isolated white-background renders leave shoppers bored. No environment means no story — how does this widget fit in a factory or toolbox?
Complex products, such as the CNC fixtures, are abstract without context. Sales are reduced because buyers will not be able to visualize actual use.
Proproduct design renders are lifestyle scenes: action on shop floors, interior views that are exploding, or 360 views. These visuals make people more engaged as they raise the purchase rate by 94 percent, transforming browsers into purchasers.
5. Overlooking Material Realism And Variations
Plastics with a generic grey color or shiny blobs do not sell. Authentic items are scratched, welded, or colored choices; DIY leaves out all of this, so it appears unnatural.
Clients are hesitant that the real product will not be similar. Lost variations imply lost upsell opportunities on custom finishes.
Texturing services include hyper-real anodized aluminum, rubber grip, or saw-timber. They produce variations of colors, wear levels, and configs within hours, just enough to make e-commerce dropdowns.
Why These Mistakes Hurt Your Bottom Line
Each error compounds. That makes the indistinct render irrelevant to searches. Unstable visuals increase the return rates by 20-40 percent. Poor viz causes delays in client or engineer approvals in manufacturing.
One missed sale on a $5,000 machine part? That’s real money. Bad renders over a year may deprive mid size shops of up to 50K in revenue.
Free software such as KeyShot or Blender is basic, but not pro. Time spent tweaking? Strokes per picture, taking out of design.
How Product Rendering Services Work
Outsourcing is an easy and quick process: 1. Transmit CAD files (STEP, IGES) through secure portal. 2. Summary of style: realistic, stylized, or animated. 3. Scenes are modeled by experts and made within 24-72 hours. 4. Modifications were made – change angles or lights freely. 5. Obtain PNG, OBJ, or video files to be used on the web or to be printed.
Prices? $100-500 per image, much cheaper than hiring in-house teams. Scalable for 10 renders or 100.
Actual Benefits Of Switching To Pros
A tooling company abandoned its rendition and observed web requests soar by 45 percent. A manufacturer of car parts reduced losses on returns by a quarter with precise lifestyle images.
The complexity in services: contemplations about chrome, transparency in plastics, and the motion blur on the video. It is now accelerated in AIs, which find optimal angles.
When To Call In Rendering Experts
You should consider calling rendering experts when: ➔ Launching new products ➔ Updating catalogs ➔ E-commerce makeovers ➔ Trade show visuals ➔ Client pitches or patents Skip in case of quick sketches; however, pros shine in case of sales-critical assets.
The five mistakes are eliminated in the production of product rendering services, which feature visuals that effectively sell. Put an end to amateur mistakes in losing sales – invest in product design renders to present your designs in an ideal light. Your products have a lot to showcase.
Modern manufacturing has evolved far beyond traditional cutting tools, hand templates, and manual layouts. CNC laser cutting has become very important today in providing precision, speed, and material efficiency in several industries. With the adoption of high-quality CAD Services like smart CAM Automation and efficient Sheet Metal Design, manufacturers can transform digital concepts into extremely precise physical components with minimal scrap. This digital-first solution enables engineers and production teams to work more efficiently, compute materials more accurately, and see that all the steps of the fabrication process are predictable and efficient.
In an era of rising material costs, shorter production timelines and when global sustainability targets are becoming more stringent, the evolution into CNC laser cutting is not a choice anymore; it is a necessity. Digital workflows reduce errors, minimize lead times and open opportunities to make smart use of materials, all of which enhance the bottom line and environmental footprint.
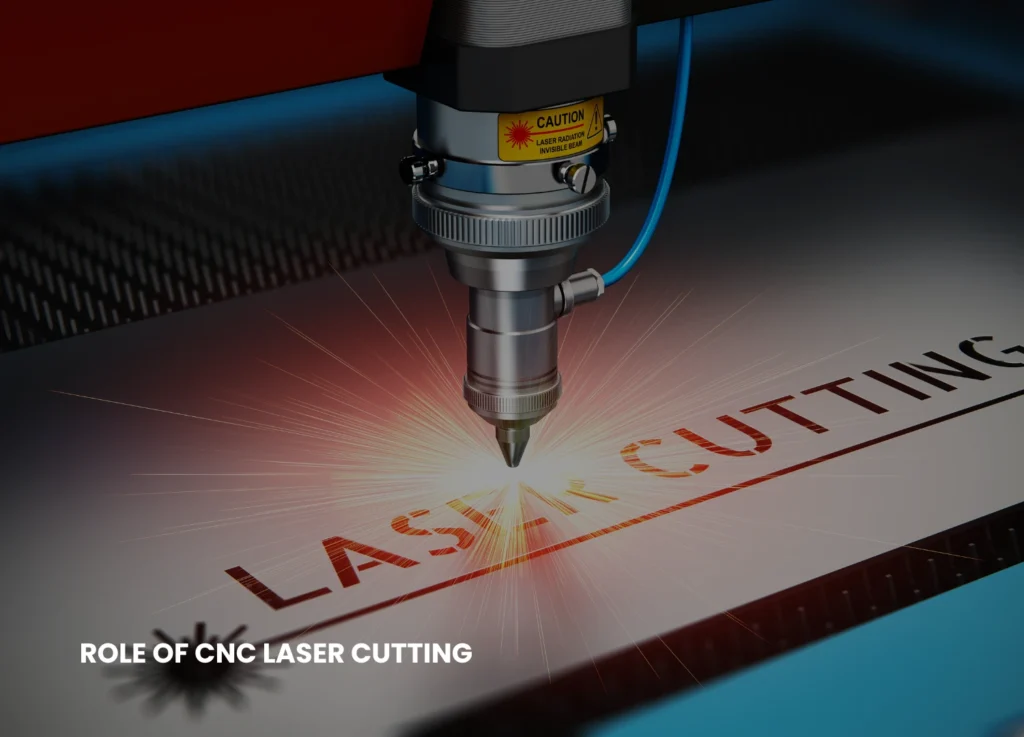
The Role of CNC Laser Cutting in Modern Manufacturing
CNC laser cutting is a process in which a high-intensity laser beam, guided by computer-generated toolpaths, melts, burns, or vaporizes material with unparalleled precision. Every cut is made from a detailed digital file developed through CAD drawing. For more complex shapes, 3D CAD modeling provides the necessary precision. As a result, the finished parts replicate the planned design perfectly. CNC laser cutting is very accurate and removes guess-work and human error, unlike the manual or mechanical methods of cutting, which are based on templates and physical alignment.
The digital nature of the workflow allows for rapid changes and immediate testing. Engineers can simulate assemblies, verify bend allowances, detect interference between parts, and analyze material stress all before the first sheet is cut. This proactive approach not only improves accuracy but also ensures that material consumption is minimized and downstream processes, such as bending, welding, and assembly, proceed smoothly. The aerospace industries, automotive industries, architectural fabrication, and industrial machinery have adopted this accuracy as they are able to produce faster, reduce scrap rates, and produce better quality components.
How CNC Laser Cutting Works — A Streamlined Digital Workflow
The CNC laser-cutting process starts with elaborate digital design, which must be proven before a physical material is touched. CAD drawings are generated by design engineers in-house. This phase can also be outsourced by procuring CAD drawing services from professional engineers.
These digital models can be used as one source of truth so that teams can identify errors at an early stage, test component fit, and simulate behaviors of the material during and after cutting. When the design is complete, CAM software translates these models into accurate machine code, calculating cutting sequences, toolpaths, pierce points, and feed rates. The algorithms used are nesting algorithms to maximize the use of sheets, so that there is little waste and that only small remnants are left and can be re-used in other jobs. The close connection between CAM and CAD makes sure that this machine reads the design in the same way it was to be read.
The sheets are positioned on the laser bed during production and aligned. The laser is directed through the programmed paths by the CNC system with assist gases being used to provide clean burr free edges. Bevel cuts, engravings, and intricate patterns on curved surfaces can also be done using multi-axis machines. Once cut, parts go directly to the bending, welding or finishing process with little or no manual intervention necessary. The outcome is a quicker, cleaner, and foreseeable production with less waste of materials.
Key steps in the workflow include:
Digital modeling and validation using CAD tools to define dimensions and tolerances accurately.
CAM processing and nesting to optimize material usage and cutting sequences.
Laser cutting operation with precise alignment and assist gas control.
Finishing and assembly, allowing parts to proceed directly to downstream operations.
CNC Laser Cutting + Sheet-Metal Design = Dramatically Less Waste
Materials are often the largest expense in sheet metal fabrication. Waste is easily built when the cuts are not precise, or the nesting process is not very efficient. Using a CNC laser cutting with a considerate Sheet Metal Design, manufacturers will be able to make the maximum out of sheet usage, minimize offcuts, and enhance the efficiency of the whole production process.
Accurate CAD models allow engineers to calculate exact material requirements, avoiding spending too much and minimizing scrap. The high-end nesting process facilitated by CAM Automation is used to place parts as close as possible to each other on the sheet to take advantage of the available space. Design for manufacturability (DFM) principles (e.g. consideration of bend reliefs, standard sheet sizes, and kerf allowance) lead to further reductions in waste and components that are easy to assemble. Parametric CAD libraries enable repeat use of design, eliminating trial and error processes which can result in scrap.
By thoughtfully integrating these steps, manufacturers can achieve consistent material efficiency across multiple production runs, minimizing both cost and environmental impact.
Cutting Errors and Rework — How Digital Precision Eliminates Them
One of the costliest aspects of manufacturing is rework. Misplaced holes, wrong tolerances or parts badly nesting sometimes necessitate a complete scrap or redrawing of sheets, which adds to labor and material overheads. The CNC laser cutting eliminates these errors by validating them digitally with precision.
The simulation of components by 3D CAD modeling enables engineers to identify interference problems during design. They also check details of dimensions and layout by using CAD drawings to make sure that the allowances in bends are correct, and all holes are where they should be. This minimizes the chances of having bad parts on the production floor.
Reduced errors translate to reduced emergency orders of materials, reduced wasted workforce, and production schedules. Finally, digital accuracy means that every sheet cut is devoted to the final product instead of being discarded because of mistakes that could be avoided.
Improving Collaboration
CNC laser cutting improves teamwork between the design, engineering, operating, and procurement departments. Due to the fact that all people work with the same CAD and CAM documents, the possibility of miscommunication has significantly decreased. The version control of files and their sharing on clouds enables the updates to be spread immediately across the departments so that all groups of people have access to the latest design and nesting data.
Transparency is also increased through centralized CAD repositories, standardized naming conventions and shared nesting templates. Procurement teams are able to order sheets by the precise material needs, production teams are able to make cuts without ambiguity and engineers can keep on updating designs without affecting any of the jobs being processed. This combined workflow decreases the waste due to duplicated parts or outdated sheets, or wrong cuts.
Speed, Scalability, and Automated Production
CNC laser cutting allows manufacturers to expand through quick prototyping on to mass production. Digital design data can undergo changes in real time and Automated CAM software converts the change into new toolpaths without stopping the production. Fiber lasers are fast to cut thin sheets, whereas the more powerful systems can cut thick metal effectively.
Automation facilitates scheduled manufacturing, remnant tracking and optimal nest reuse. Laser-cut components are passed reliably back to bending, welding, and finishing facilities, which facilitate lean, prefabricated processes to reduce handling and enhance throughput. Speed, repeatability and automation of CNC laser cutting make it appropriate to new manufacturing environments that require speed, repetitive cycles and automation.
Benefits of automation and scalability include:
Rapid updates to design files and CAM programs for flexible production.
Optimized nesting and remnant tracking to reduce scrap and waste.
Efficient integration with bending, welding, and finishing processes.
High-speed production without sacrificing accuracy or quality.
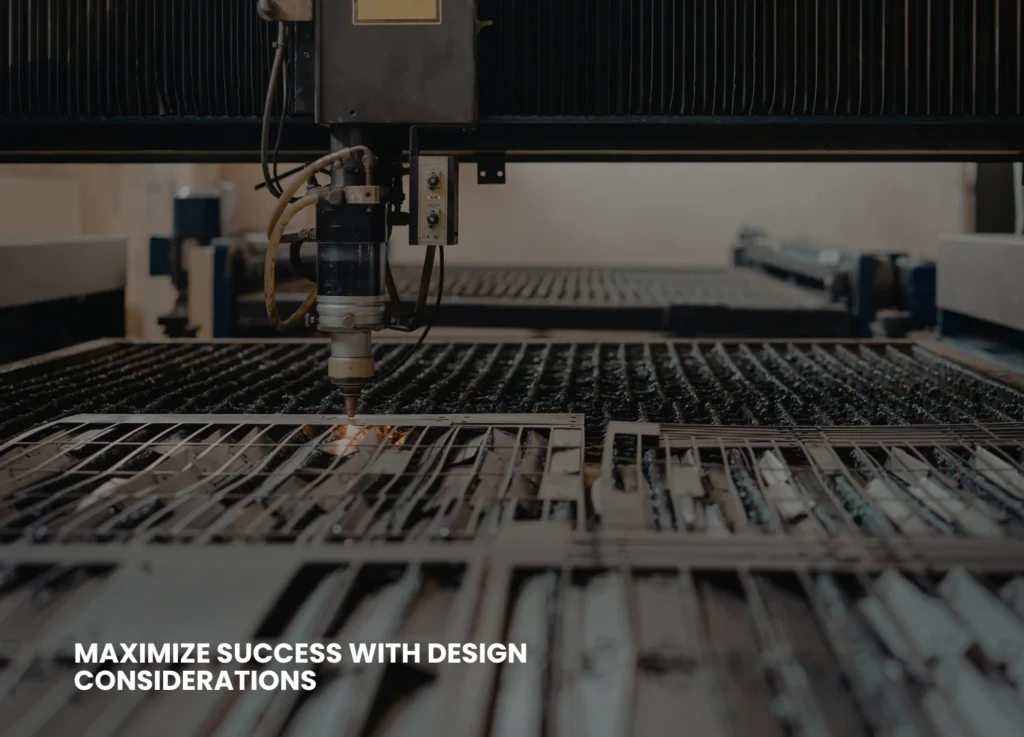
Design Considerations to Maximize Success
In order to maximize the advantages of CNC laser cutting, designers are advised to take into account the thickness of the material in relation to laser power, the allowance in kerf of assembling parts, and the correct size of the hole and feature in order to eliminate distortion. The nesting strategy also plays a crucial role: combining parts on the basis of thickness and material is easy to produce, and the changeover of sheet is minimized. Reusable remnants can also be tracked and fed back into subsequent nesting calculations to even further optimize the use of materials.
When these design considerations are combined with drawing services, automation, and design services, engineers can achieve minimal material waste, consistent quality and high productivity.
Integrating CNC Laser Cutting with Broader Digital Manufacturing
The effectiveness of CNC laser cutting is enhanced when combined with other digital tools. Precise models created through CAD drawing and 3D CAD modeling pass directly into CAM Automation to create optimized nests, minimize cycle time and scrap.
Advanced integration involves Artificial Intelligence-based nesting, automated reuse of remnants, and closed-loop quality. Linking digital design, machine control and material tracking, the manufacturers develop a wholly interconnected workflow that eradicates inefficiencies and minimizes costs and enhances predictability through the lifecycle of production.
Future Trends
The future of CNC laser cutting will be a capability that takes advantage of AI, robotics, and cloud- based collaboration to enhance precision and waste reduction. Future technologies involve self- Adjusting sensors to adjust cutting parameters on-the-fly, hybrid machines which cut and weld simultaneously and predictive maintenance tools which reduce downtime. Remote CAD/CAM collaboration will enable working groups located in different regions of the country and AI-powered nesting schemes will constantly streamline the use of materials according to past production data.
Manufacturers that embrace such innovations will have an edge, having improved quality, increased production rate and reduced environmental impact.
Conclusion
CNC laser cutting, when combined with disciplined CAD workflows, CAM Automation and thoughtful sheet-metal design, transforms manufacturing into a highly efficient, low-waste process. Digital perfection removes errors, speeds up manufacturing and will guarantee predictable material usage. Companies often have their own employees to deal with such works but in modern world, the trend is shifting. Many now hire CAD Drawing Services, CAM Automation through cloud software, Sheet Metal Design Services and even 3D CAD Modelling Services through freelancers online. This saves them office space and allows them to work with the best talent from all over the world.
Companies that embrace such technologies would realize increased throughput, reduced scrap, and uniform quality that would place them in a vantage position to succeed in the current competitive manufacturing environment that is being driven by sustainability principles.
One of the main concerns of any business that wants to compete in the competitive modern market is to reduce its manufacturing costs. This can be best attained by adopting a sophisticated nesting service in your manufacturing procedure. This blog post discusses the functionality of such a complex nesting technology, why it results in high cost savings, and how both big and small manufacturers can benefit by opting for this move.
What Is An Advanced Nesting Service?
Advanced nesting service is a kind of software system that provides an optimal effort to the layout of parts that will be cut out of the raw materials metal, wood, glass, or fabric. Nesting software can automatically find the most efficient arrangement of parts, as compared to arranging them manually, which is slow and prone to error. The nesting service assists manufacturers by creating a strict parts inventory to save on materials and reduce waste, and increase throughput.
Optimizing The Materials Usage
The enhanced usage of materials is among the main advantages of high-tech nesting. All of the wastage is an unwanted expense, and the less effectively you can utilize your raw material means the less money you will save. Nesting software follows complex algorithms in order to make sure the parts are organized in a manner that results in minimal scraps. This may mean a few percentage points of material savings to many manufacturers – even 5-10%.
Cost-saving in materials directly affects the profitability, particularly when there is a fluctuation in the raw material prices. In the long run, a constant increase in the yield rate implies that the amount of waste is reduced to recycling or the landfill, and the amount of money allocated to purchasing materials necessary to create the same volume of work gets smaller.
Increased And Quicker Production
Nesting software also enhances speed and uniformity of production, besides material saving. Manual part layout may consume hours, particularly in complicated projects. Through nesting software, this task is automated, and manual layout is not required, as it does not lead to human error. This allows firms to manufacture more parts within a shorter period of time, and the time taken to satisfy a customer decreases as well.
By complex automation, employees will be able to concentrate on more valuable activities, as opposed to wasting time on manual layout planning, which is time-consuming. Not only does this shift create productivity, but it can also reduce labor expenses, as manual work will be minimized in terms of time spent on it.
Scrap And Waste Disposal Costs Reduction
All manufacturing processes are concerned with scrap, yet excess scrap is expensive. In the case of advanced nesting, waste is greatly reused not only due to smaller packing of parts but also due to the ability of the software to reuse the previous scrap remnants in upcoming tasks. This ultimately causes a decrease in the cost of raw materials as well as the cost of disposing of or recycling waste products.
The more sophisticated nesting services like CAMworks Nesting can even be linked to the inventory management system to trace and re-use the remaining pieces, which leads to an even better efficiency and saves the necessity to buy new raw materials.
Higher Throughput And Productivity Of Machines
This can also be enhanced by a powerful nesting service to enhance overall equipment effectiveness (OEE), which can be achieved by making sure that machines dedicate more time to cutting and less time waiting until layouts have been prepared. Indicatively, machine time has been cut by more than 10% due to increased nesting and motion optimization by some companies. Increased throughput not only enhances productivity but also enhances the capacity of the manufacturer to deliver on time and receive more orders.
Lower Labor And Setup Costs
The state-of-the-art software ensures that the entire nesting process is automated, and this saves labor and hours that the company would have employed highly skilled people to arrange the parts manually. This makes labor costs less and enables competent engineers and machine operators to concentrate on other production priorities. Moreover, setup times are decreased as workers do not have to interrupt as much to restart machines, which results in further cost reduction, as well as the number of necessary stop and reset operations of machines is reduced, thus saving more money.
Faultless Interconnection With The Production Systems
The Solidworks Cam Service software is modern and is aimed at working with CAD, CAM, and ERP systems in place. Regardless of what equipment is used: plasma cutters, lasers, routers, or others, the appropriate nesting software can automatically supply design files and material data, and the production process becomes more efficient, and the risk of error caused by manual data input is minimized. This integration is important to manufacturers who have several machines or intricate workflows, to enable every part of the production process to flow smoothly. It is possible to schedule orders in a more precise way and identify and solve production bottlenecks much faster.
Multi-Order And Remnant Nesting To Get Even More Savings
The next level is advanced nesting services, which provide such features as multi-order nesting – parts of multiple work orders are nested together into one nest – and remnant nesting, which recycles unused materials effectively. These characteristics result in further savings as the utilization of materials used on every task is maximized, as opposed to each order being treated as a different case, as was before.
Real Life Savings Example
Take the example of a metal fabrication shop that used to analyze all the parts manually. Once they had switched to an advanced nesting service, their scrap rate decreased by 7 percent, and their machine set up times became almost 15 percent less; and half the labor spent on layout was realized. All this saved money equated to a considerable decrease in the total cost of manufacturing quality products.
Getting Started With Advanced Nesting: These are the action steps to initiate cost reduction in the manufacturing cost:
➔ Examine your present degree of waste and handwork in the apportionment of parts. ➔ Establish nesting solutions that are associated with your existing machine(s) and software. ➔ Conduct pilot projects on which to compare on savings of material and the improvement of the process. ➔ The nesting service can be established as part of your routine workflows by training your team.
Conclusion
One of the quickest and simplest means of reducing the costs of manufacturing is implementing an advanced nesting service. With the material waste reduction, labor and setup reduction, and maximum machine efficiency, nesting solutions are worth their money, even in the small and mid-sized shops. Advanced nesting technology is an effective means of creating a leaner competitive operation in the market where even a one percent variance of savings can count. Keyways offers you advanced nesting service to help ease your manufacturing process by cutting costs. For more information on services, visit our LinkedIn.
Construction has gone way past manual designs and blueprints nowadays. The CAD design services are essential in the fast-paced modern world, leading to accuracy, material savings, and a smooth-running project. Using the CAD tools at the design and planning phases, architects, engineers, and construction managers have a clearer understanding of projects, identify the mistakes at an earlier stage, and are able to utilize the resources most efficiently. The shift not only becomes efficient but also contributes to the reduction of material waste, which is one of the most burning problems of modern construction.
The Role of CAD in Construction
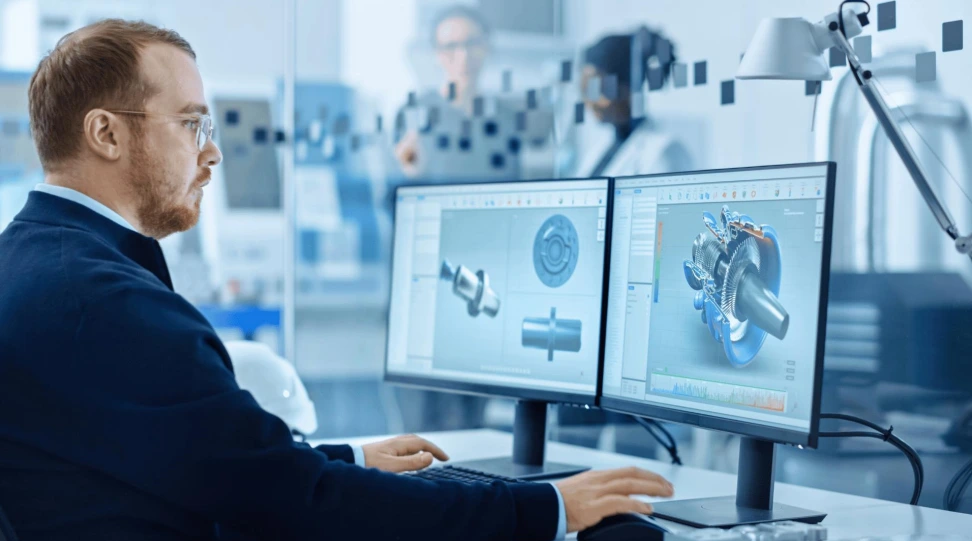
CAD design services involve the use of specialized software to design accurate digital representations and drawings of buildings, infrastructure, and mechanical components. They are much more than just the simple drawings; experts can simulate everything about a project, and actually do not have to touch the physical part of a project before starting to work on it. The CAD files are characterized by high degrees of accuracy, scalability, and compatibility with other digital construction procedures, such as Building Information Modeling (BIM) and 3D printing.
Since such designs are digital, changes can be easily implemented. Before spending a single dollar in procurement or labor, engineers can revise layouts, test structural integrity, analyze materials, and estimate quantities. Besides making the project more efficient, such proactive planning will help avoid unnecessary purchases and rework.
The Relationship Between CAD Design And Material Efficiency
Project costs usually constitute a large percentage of construction materials (as much as 50 percent). Poor planning or inefficient design may result in waste of materials and cost overrun, and environmental degradation. CAD design services are directly related to these problems. Here’s how: ● Proper Quantity Estimation: CAD software determines an exact volume of materials used, i.e., steel, concrete, or wiring, required in a project. This minimizes over-ordering and excess stock.
● Streamlined Designs: CAD systems are used in formulating the best spatial layouts so that the materials can be cut and trimmed to fit each other. ● Error Detection: Minimal mistakes in the plan or measuring may result in significant waste on-site. The accuracy of CAD design services and the validation it provides minimizes human error that contributes to such errors. ● Reusability of Designs: A CAD model can be reused or modified to use later after it has been created. This enables the companies to standardize the components and conserve resources in repetitive designs.
These are the key areas that CAD pays attention to and thereby limits unnecessary consumption and encourages sustainable building.
Eliminating Rework With Digital Precision
One of the largest contributors to construction projects’ inefficiencies and wastes is reworking projects. In cases where initial plans are inaccurate or incomplete, the construction teams are usually required to tear down and restructure parts, which is a waste of materials and labor hours. By giving a clear and detailed background at the very inception, CAD design eliminates these problems.
Virtual walkthroughs and 3D modeling enable the stakeholders of the project to discover issues or conflicts in the design. This problem-solving approach at an early stage reduces wastage as well as ensures that the project schedule is not delayed.
Improving Inter-Team Cooperation
Some of the various disciplines that are involved in construction include architects, engineers, surveyors, and contractors. Lack of proper communication between these parties may result in mistakes and redundancy. CAD design services facilitate a harmonious collaboration with digital sharing and up-to-date information.
CAD files may be shared in real time as opposed to using paper blueprints or various fixed documents. They all work on the same copy of the design, and the likelihood of confusion is minimized. Other CAD drafting services systems are cloud-based, which means that a team can access, edit, and review files regardless of their locations. This interlinked workflow makes sure that the coordination of changes is good and the purchased materials are according to the latest approved drawings.
Increasing The Speed & Construction Efficiency
Time saved in construction would turn out to be money saved. CAD simplifies a number of phases in the project lifecycle:
● Rapid Designing: Templates and automated tools make it possible to take a lot less time to draft. ● Simulation and Testing: CAD would enable design testing in a virtual environment with different real-life conditions without incurring delays due to material or structure problems that would be realized late into the construction. ● Prefabrication Support: CAD data may be directly transferred to fabrication machines or modular structure plants, as standardized components are created very fast and in highly precise amounts. Such developments reduce the time required for a project and still guarantee high quality and safety. Fewer material problems and high speeds would lead to lower cost and a lower environmental footprint.
Supporting Sustainability Goals
The present-day constructions have to be eco-friendly and not maximize growth. Waste in materials not only adds to the cost but also adds to the pollution and landfill. The design of CAD is also vital in ensuring that the goals of sustainability are met by promoting the maximization of resources. Through modeling the energy performance of buildings, the engineers will be able to select designs that are efficient and consume less energy. Moreover, CAD assists in accurate cutting and assembly, and therefore, minimal waste is generated. CAD-based data is being used by many construction companies to address green building standards like LEED (Leadership in Energy and Environmental Design).
Integrating CAD With Other Digital Technologies
Combined with the other digital technologies of construction, the real potential of CAD can be even higher: ● Building Information Modeling (BIM): BIM is a combination of 3D CAD artistic arrangement with the scheduling, costing, and maintenance information that forms an intelligent system developed over the lifecycle of a building. ● Augmented & Virtual Reality (AR/VR): CAD data can be represented in a 3D immersive environment to make decisions and provide presentations to clients. ● AI & Machine Learning: Predictive algorithms are able to analyze CAD data in order to propose material-saving designs or enhance safety. Combining CAD with such innovations, companies are going to be able to attain greater heights of accuracy, efficiency, and sustainability.
Future Trends In CAD Construction
The CAD design services will emerge as one of the major facilitators of the advancement as the construction industry proceeds to digital transformation. Even smarter systems will be introduced in the future with better automation, real-time collaboration, and connection with IoT sensors to track onsite performance. The eco-friendly buildings, cost control, and quality assurance will help the companies that fully utilize the workflows based on CAD to outperform their competitors in the long run. The minimization of material waste and the increased efficiency are no longer a dream; it is a goal that technology can create. Keyway specializes in optimizing your design ecosystem, ensuring seamless organization and accessibility of your design assets. To know more about the business, visit our LinkedIn.
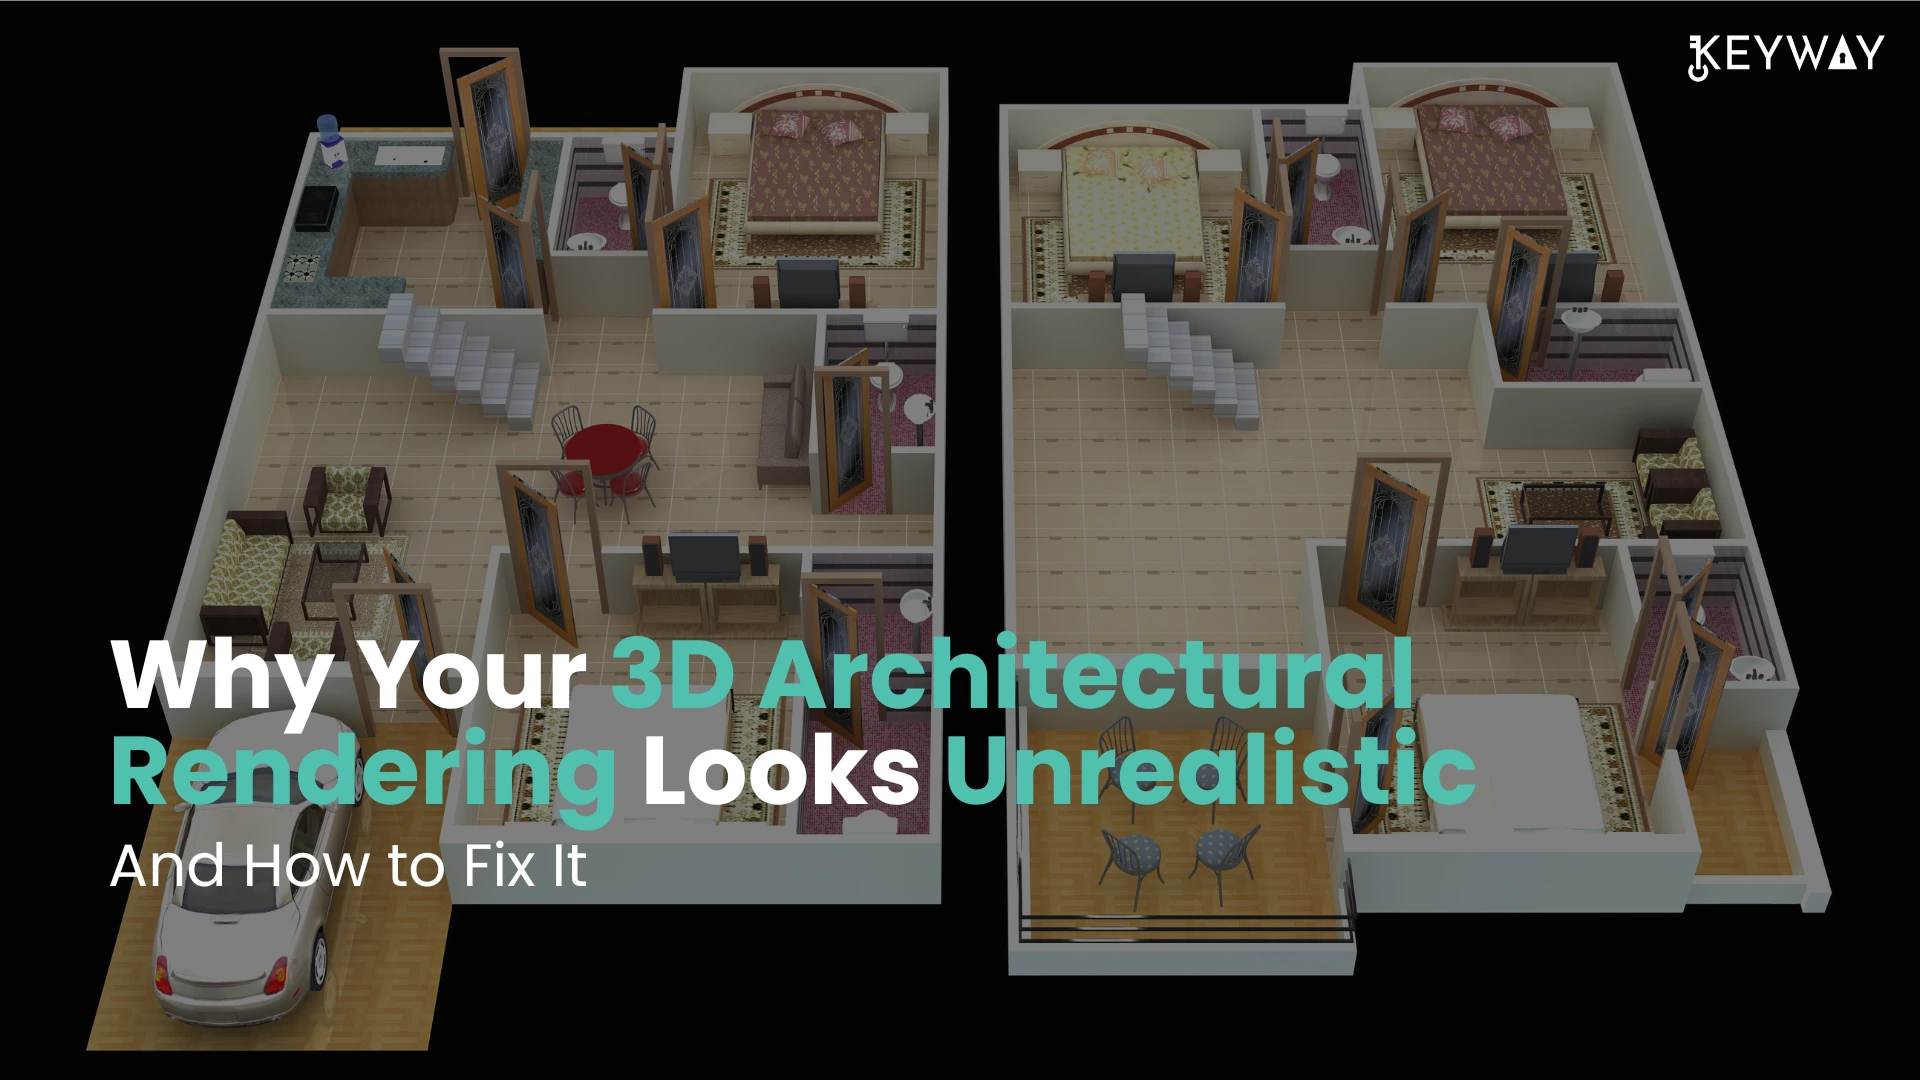
When your 3D architectural images are more of digital toys than convincing, realistic scenes, you are not alone. Most designers find it difficult to make their visuals appear real, particularly when communicating with clients or sharing marketing properties on the internet. Here, you will get to know the most frequent causes of your 3D architectural renders not appearing real and how these problems can be resolved with simple and easy steps that even novices can manage. One can also opt for 3D architectural rendering services from a reliable service provider.
Why 3D Architectural Renderings Are Unrealistic?
The majority of the realism issues in 3D art rendering are a result of omitted details, lack of artistry, or technical compromises. Let’s explore the top causes here.
Low Quality of Lighting And Shadows
The most significant thing that can distinguish between fake, flattened pictures of objects and the true, photorealistic images is lighting. Poor/improper lighting, such as the absence of enough bounces of light, a wrong shadow model, or a lack of global illumination, causes surfaces to appear sterile and dull.
Inappropriate Textures And Flat Materials
Repeating low-resolution textures (i.e., tiles of wood or artificially smooth concrete) is a tell-tale sign of digital creation of your scene. Likewise, materials that do not respect reflectivity, bump mapping, or minor flaws always appear off-color.
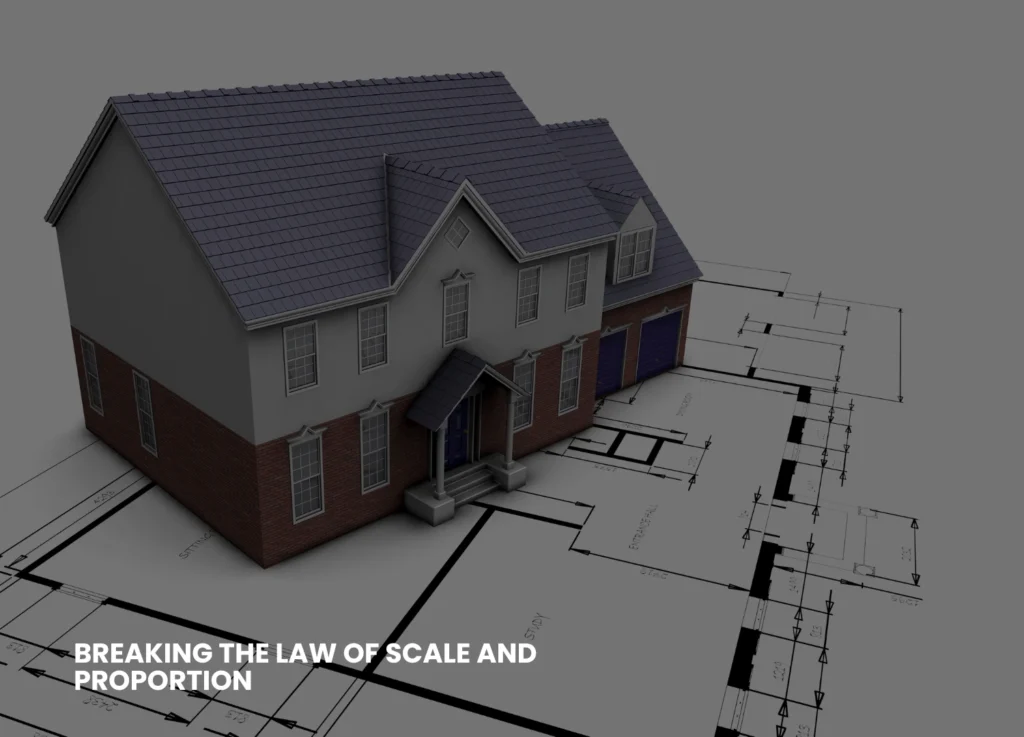
Breaking The Law of Scale And Proportion
When the door is too tall, the window too small, or the proportions of furniture appear strange, viewers will immediately know that something is not right–not necessarily the reason why. They need to be consistent with actual architectural dimensions.
Lack of Detail And Context
Bare images with a minimal number of objects or no elements of everyday life (people, clutter, vegetation) are like empties rather than inhabited places. In isolation, even a technically correct model does not give a realistic impression.
Unnatural Camera Angles & Composition
Capturing views of a space that assume the God’s eye view or the ultra-wide views without considering the view of individuals who will be using the space can cause the image to become unnatural. Framing and real- world focal length are required to be good and realistic for realistic 3D renders, respectively.
Too Clean And Perfect
Nothing in the real world is pristine; there is always a crack, a stain, a patch of muddy grass, or a worn-out detail. A perfect surface in the rendering seems soulless and unnatural.
The Secret To Making More Realistic Renders
The good news? All these can be fixed, just a little knowledge and the desire to include (or omit) detail where necessary. Here are a few ways to assist you in making your 3D architectural rendering more realistic.
Master Lighting Techniques
➔ Make physically-based lighting systems in your 3D software. Use sunlight, environmental lights (HDRI), as well as realistic light color temperatures.
➔ Activate global illumination and permit sufficient light bounces to decrease the shadows and replicate the effects of the real world.
➔ Test time-of-day settings. There are warm shadows produced during the golden hour (early morning or late afternoon).
Improve Textures And Materials
➔ Every time, employ high-resolution textures that are based on real materials. The mapping coordinates should be randomized to avoid their obvious repetition.
➔ Add bump, normal, or displacement maps to provide surfaces with depth and touch.
➔ Make it look like it is a real-life situation by adding some roughness, dirt, or flaws.
Check Your Scale-Always
➔ Draw based on a correct floor plan or architectural blueprint, with the correct units throughout your
design workflow.
➔ Before rendering, make sure that proportions are checked by putting a reference human (a figure of average height) in your scene. You can also opt for professional 3D architectural rendering services.
Insert Environment Information And Context
➔ Provide the room with life-like models- space can be made relatable by having curtains, rugs, books, or electrical outlets.
➔ When dealing with exteriors, add such street elements as streetlights, trees, benches, or mailboxes. ➔ Minimal, minute details assist the viewer in envisioning the life that occurs in the renders.Select Natural Camera Angles
➔ Place your camera at human eye height (approximately 1.6 meters).
➔ Most interiors take normal focal lengths (35-50mm equivalent), which are not extreme wide-angles-only very necessary.
➔ Squeeze the composition using the rule of thirds to create a welcoming architectural visualization quality.
Adopted Controlled Imperfection
➔ Break up perfect symmetry. Slide or lean a picture frame.
➔ Vary wear and tear: scuff marking on floors, fingerprinting on glass, or some minor weathering of wood.
➔ You can add some personal details, such as pillows out of place, shoes at the door, or coffee cups uncleaned.
Use Atmospheric Effects
➔ Light haze, subtle fog, or soft depth of field may add to the impression of space and realism- when done sparingly.
➔ The post-production effects should not be too excessive; colors, brightness, and contrast must remain in the range of real photography.
Learn From Real Photography
➔ Examples taken from areas like your project.
➔ And see the play of light upon materials, and the impressions of objects, or the appearance of actual shadows, and repeat these in your renders.
Quick Troubleshooting Checklist For You
Here are some of the questions you must ask yourself.
➔Have all the materials been mapped properly, at natural scales?
➔Do the sources of light make sense?
➔Are there shadows and reflections of the objects?
➔Have you put in environmental things and evidence of everyday life?
➔Do proportions and measures go hand in hand with plans?
➔Does your end product have visible repeat material and unnatural finishes?
Common Mistakes and How to Fix Them
Here’s a table to summarize common mistakes that need to be avoided and their fixation.
Problem
Solution
Flat Lighting
Add global illumination, tweak shadows
Fake-Looking Materials
Use high-res, physically correct textures
Bad Composition
Adjust camera angle and lens, frame shots better
Lack of Real-World Detail
Add clutter, imperfections, and life-like touches
Scaling Errors
Always build to true size, cross-check proportions
Sterile, Empty Spaces
Populate with furniture and people, add context
Final Thoughts
Computer-generated art and science combine to create realistic 3D architectural renderings. Although contemporary software offers you nearly infinite possibilities, it is your focus on the details, light, material, proportion, and life that makes a sterile 3D model a scene that evokes emotion and imagination in the viewer. The fundamental errors will be corrected, and hence, the next time you present or market your image, it will not just awe your clients but will make them see what you have visualized in the future. Be inspired and never stop practicing, and you will always find the magic in the real world to bring it to your renders. Keyway offers you tailored rendering and animations to provide you with seamless integration of graphic expertise. For more information on our business, visit our LinkedIn.