5 Costly Product Visualization Mistakes You Make Without A Product Rendering Service

Product selling today depends on the visualization of products. Bad renders will reduce the quality design into cheapness, drive away buyers, and sales. In the absence of a professional product rendering service, manufacturers and designers are guilty of making simple errors that cost them thousands in lost opportunities. The blog discusses the 5 most expensive mistakes and the ways to fix them with the help of expert rendering services as quickly as possible.

A MAN PLANNING A 3D RENDERING PROJECT FOR ENGINEERING FIRM


1. Low-Quality Or Blurry Images

Bad quality photos or simple screenshots of CAD software do not impress. Customers get to magnify online and view pixels or jagged edges, and believe that the product is of low quality.

This murder conversions – research results indicate high-res images increase sales by 30 percent. In the absence of proper lighting or textures, your renders are two-dimensional and unattractive.

Product rendering services use ray-tracing tech for photorealistic images at 8K resolution. They incorporate real-life materials such as metal shine or cloth creasing, and make components pop on websites and catalogues.

2. Incorrect Lighting And Shadows

Products are unnatural because of harsh overhead lights or the absence of shadows. Shadows bring a layer of three dimension, and DIY renders usually lack them, and the objects end up drifting like cartoons.

Customers become suspicious – no one wishes to have a machine component that looks like a toy. Poor lighting conceals the form of details such as curves or engravings, which have to be guessed.

The rendering professionals reproduce natural-like lighting: diffused studio lights, strong spotlights, or sunlight. Dynamic shadows demonstrate the interaction of products and environments so that customers can get an idea of how products can be implemented in practice.

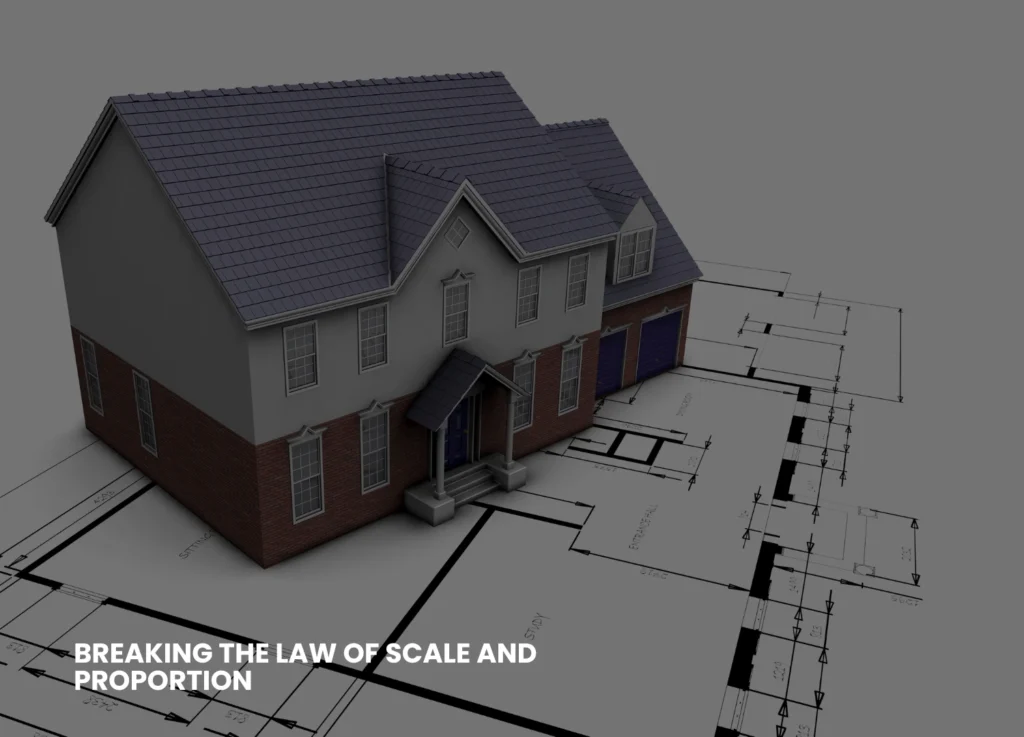
3. Irregular Scales And Proportions

The renders in which components appear excessively large, small, or distorted confuse the audience. A gearbox can be minute compared to a bolt without the right angles of the camera.

This leads to wrong expectations and returns. Customers place orders based on visuals, after which they complain of the fit or size of the product.

The exact scaling of CAD files is used by the services with reference objects, such as hands or tools, to guide them. They provide several perspectives, like close-ups, explosions, and complete assemblies, which are always taken with correct proportions.


A PICTURE SAYING MISTAKES HELP ME LEARN


4. Lack of Context Or Lifestyle Scenes

Isolated white-background renders leave shoppers bored. No environment means no story — how does this widget fit in a factory or toolbox?

Complex products, such as the CNC fixtures, are abstract without context. Sales are reduced because buyers will not be able to visualize actual use.

Pro product design renders are lifestyle scenes: action on shop floors, interior views that are exploding, or 360 views. These visuals make people more engaged as they raise the purchase rate by 94 percent, transforming browsers into purchasers.

5. Overlooking Material Realism And Variations

Plastics with a generic grey color or shiny blobs do not sell. Authentic items are scratched, welded, or colored choices; DIY leaves out all of this, so it appears unnatural.

Clients are hesitant that the real product will not be similar. Lost variations imply lost upsell opportunities on custom finishes.

Texturing services include hyper-real anodized aluminum, rubber grip, or saw-timber. They produce variations of colors, wear levels, and configs within hours, just enough to make e-commerce dropdowns.

Why These Mistakes Hurt Your Bottom Line

Each error compounds. That makes the indistinct render irrelevant to searches. Unstable visuals increase the return rates by 20-40 percent. Poor viz causes delays in client or engineer approvals in manufacturing.

One missed sale on a $5,000 machine part? That’s real money. Bad renders over a year may deprive mid size shops of up to 50K in revenue.

Free software such as KeyShot or Blender is basic, but not pro. Time spent tweaking? Strokes per picture, taking out of design.

How Product Rendering Services Work

Outsourcing is an easy and quick process:
1. Transmit CAD files (STEP, IGES) through secure portal.
2. Summary of style: realistic, stylized, or animated.
3. Scenes are modeled by experts and made within 24-72 hours.
4. Modifications were made – change angles or lights freely.
5. Obtain PNG, OBJ, or video files to be used on the web or to be printed.

Prices? $100-500 per image, much cheaper than hiring in-house teams. Scalable for 10 renders or 100.

Actual Benefits Of Switching To Pros

A tooling company abandoned its rendition and observed web requests soar by 45 percent. A manufacturer of car parts reduced losses on returns by a quarter with precise lifestyle images.

The complexity in services: contemplations about chrome, transparency in plastics, and the motion blur on the video. It is now accelerated in AIs, which find optimal angles.

When To Call In Rendering Experts

You should consider calling rendering experts when:
➔ Launching new products
➔ Updating catalogs
➔ E-commerce makeovers
➔ Trade show visuals
➔ Client pitches or patents
Skip in case of quick sketches; however, pros shine in case of sales-critical assets.

The five mistakes are eliminated in the production of product rendering services, which feature visuals that effectively sell. Put an end to amateur mistakes in losing sales – invest in product design renders to present your designs in an ideal light. Your products have a lot to showcase.

Why Your 3D Architectural Rendering Looks Unrealistic — And How to Fix It

When your 3D architectural images are more of digital toys than convincing, realistic scenes, you are not alone. Most designers find it difficult to make their visuals appear real, particularly when communicating with clients or sharing marketing properties on the internet. Here, you will get to know the most frequent causes of your 3D architectural renders not appearing real and how these problems can be resolved with simple and easy steps that even novices can manage. One can also opt for 3D architectural rendering services from a reliable service provider.

Why 3D Architectural Renderings Are Unrealistic?

The majority of the realism issues in 3D art rendering are a result of omitted details, lack of artistry, or technical compromises. Let’s explore the top causes here.

3D Architectural Design

Low Quality of Lighting And Shadows

The most significant thing that can distinguish between fake, flattened pictures of objects and the true, photorealistic images is lighting. Poor/improper lighting, such as the absence of enough bounces of light, a wrong shadow model, or a lack of global illumination, causes surfaces to appear sterile and dull.

Inappropriate Textures And Flat Materials
Repeating low-resolution textures (i.e., tiles of wood or artificially smooth concrete) is a tell-tale sign of digital creation of your scene. Likewise, materials that do not respect reflectivity, bump mapping, or minor flaws always appear off-color.
Breaking The Law of Scale And Proportion
When the door is too tall, the window too small, or the proportions of furniture appear strange, viewers will immediately know that something is not right–not necessarily the reason why. They need to be consistent with actual architectural dimensions.
Image Of 3D render House design
Lack of Detail And Context
Bare images with a minimal number of objects or no elements of everyday life (people, clutter, vegetation) are like empties rather than inhabited places. In isolation, even a technically correct model does not give a realistic impression.
Unnatural Camera Angles & Composition
Capturing views of a space that assume the God’s eye view or the ultra-wide views without considering the view of individuals who will be using the space can cause the image to become unnatural. Framing and real- world focal length are required to be good and realistic for realistic 3D renders, respectively.
Too Clean And Perfect
Nothing in the real world is pristine; there is always a crack, a stain, a patch of muddy grass, or a worn-out detail. A perfect surface in the rendering seems soulless and unnatural.

The Secret To Making More Realistic Renders

The good news? All these can be fixed, just a little knowledge and the desire to include (or omit) detail where necessary. Here are a few ways to assist you in making your 3D architectural rendering more realistic.
Making Realistic Renders
Master Lighting Techniques
Make physically-based lighting systems in your 3D software. Use sunlight, environmental lights (HDRI), as well as realistic light color temperatures.
Activate global illumination and permit sufficient light bounces to decrease the shadows and replicate the effects of the real world.

Test time-of-day settings. There are warm shadows produced during the golden hour (early morning or late afternoon).

Improve Textures And Materials

Every time, employ high-resolution textures that are based on real materials. The mapping coordinates should be randomized to avoid their obvious repetition.
Add bump, normal, or displacement maps to provide surfaces with depth and touch.

Make it look like it is a real-life situation by adding some roughness, dirt, or flaws.

Check Your Scale-Always

Draw based on a correct floor plan or architectural blueprint, with the correct units throughout your
design workflow.
Before rendering, make sure that proportions are checked by putting a reference human (a figure of average height) in your scene. You can also opt for professional 3D architectural rendering services.
Insert Environment Information And Context

Provide the room with life-like models- space can be made relatable by having curtains, rugs, books, or electrical outlets.

When dealing with exteriors, add such street elements as streetlights, trees, benches, or mailboxes.
Minimal, minute details assist the viewer in envisioning the life that occurs in the renders.Select Natural Camera Angles
Place your camera at human eye height (approximately 1.6 meters).
Most interiors take normal focal lengths (35-50mm equivalent), which are not extreme wide-angles-only very necessary.

Squeeze the composition using the rule of thirds to create a welcoming architectural visualization quality.

Adopted Controlled Imperfection


Break up perfect symmetry. Slide or lean a picture frame.
Vary wear and tear: scuff marking on floors, fingerprinting on glass, or some minor weathering of wood.

You can add some personal details, such as pillows out of place, shoes at the door, or coffee cups uncleaned.

Use Atmospheric Effects


Light haze, subtle fog, or soft depth of field may add to the impression of space and realism- when done sparingly.
The post-production effects should not be too excessive; colors, brightness, and contrast must remain in the range of real photography.

Learn From Real Photography


Examples taken from areas like your project.
And see the play of light upon materials, and the impressions of objects, or the appearance of actual shadows, and repeat these in your renders.
Quick Troubleshooting Checklist For You
Here are some of the questions you must ask yourself.
Have all the materials been mapped properly, at natural scales?
Do the sources of light make sense?
Are there shadows and reflections of the objects?
Have you put in environmental things and evidence of everyday life?
Do proportions and measures go hand in hand with plans?
Does your end product have visible repeat material and unnatural finishes?
Common Mistakes and How to Fix Them
Here’s a table to summarize common mistakes that need to be avoided and their fixation.
ProblemSolution
Flat LightingAdd global illumination, tweak shadows
Fake-Looking MaterialsUse high-res, physically correct textures
Bad CompositionAdjust camera angle and lens, frame shots better
Lack of Real-World DetailAdd clutter, imperfections, and life-like touches
Scaling ErrorsAlways build to true size, cross-check proportions
Sterile, Empty SpacesPopulate with furniture and people, add context


Final Thoughts
Computer-generated art and science combine to create realistic 3D architectural renderings. Although contemporary software offers you nearly infinite possibilities, it is your focus on the details, light, material, proportion, and life that makes a sterile 3D model a scene that evokes emotion and imagination in the viewer. The fundamental errors will be corrected, and hence, the next time you present or market your image, it will not just awe your clients but will make them see what you have visualized in the future. Be inspired and never stop practicing, and you will always find the magic in the real world to bring it to your renders. Keyway offers you tailored rendering and animations to provide you with seamless integration of graphic expertise. For more information on our business, visit our LinkedIn.